Development workflow
The core development loop in codev — change metadata in your dev org, retrieve it into a package, commit, validate, and raise a pull request.
The development loop in codev: fetch a development org, make changes in it, retrieve the changes into a package in your project, commit them on your branch, validate the commit against a review environment, and raise a pull request. This page walks the loop end to end.
Get a development org
Development orgs come from pools — prepared sandboxes or scratch orgs with your project's packages already installed. Fetch one from the Pools page and it is assigned to you for the hours you request. See Fetching and using environments.
Dev > My Orgs > Assigned to Me lists the orgs you currently hold, with their pool, status, and time until expiry.
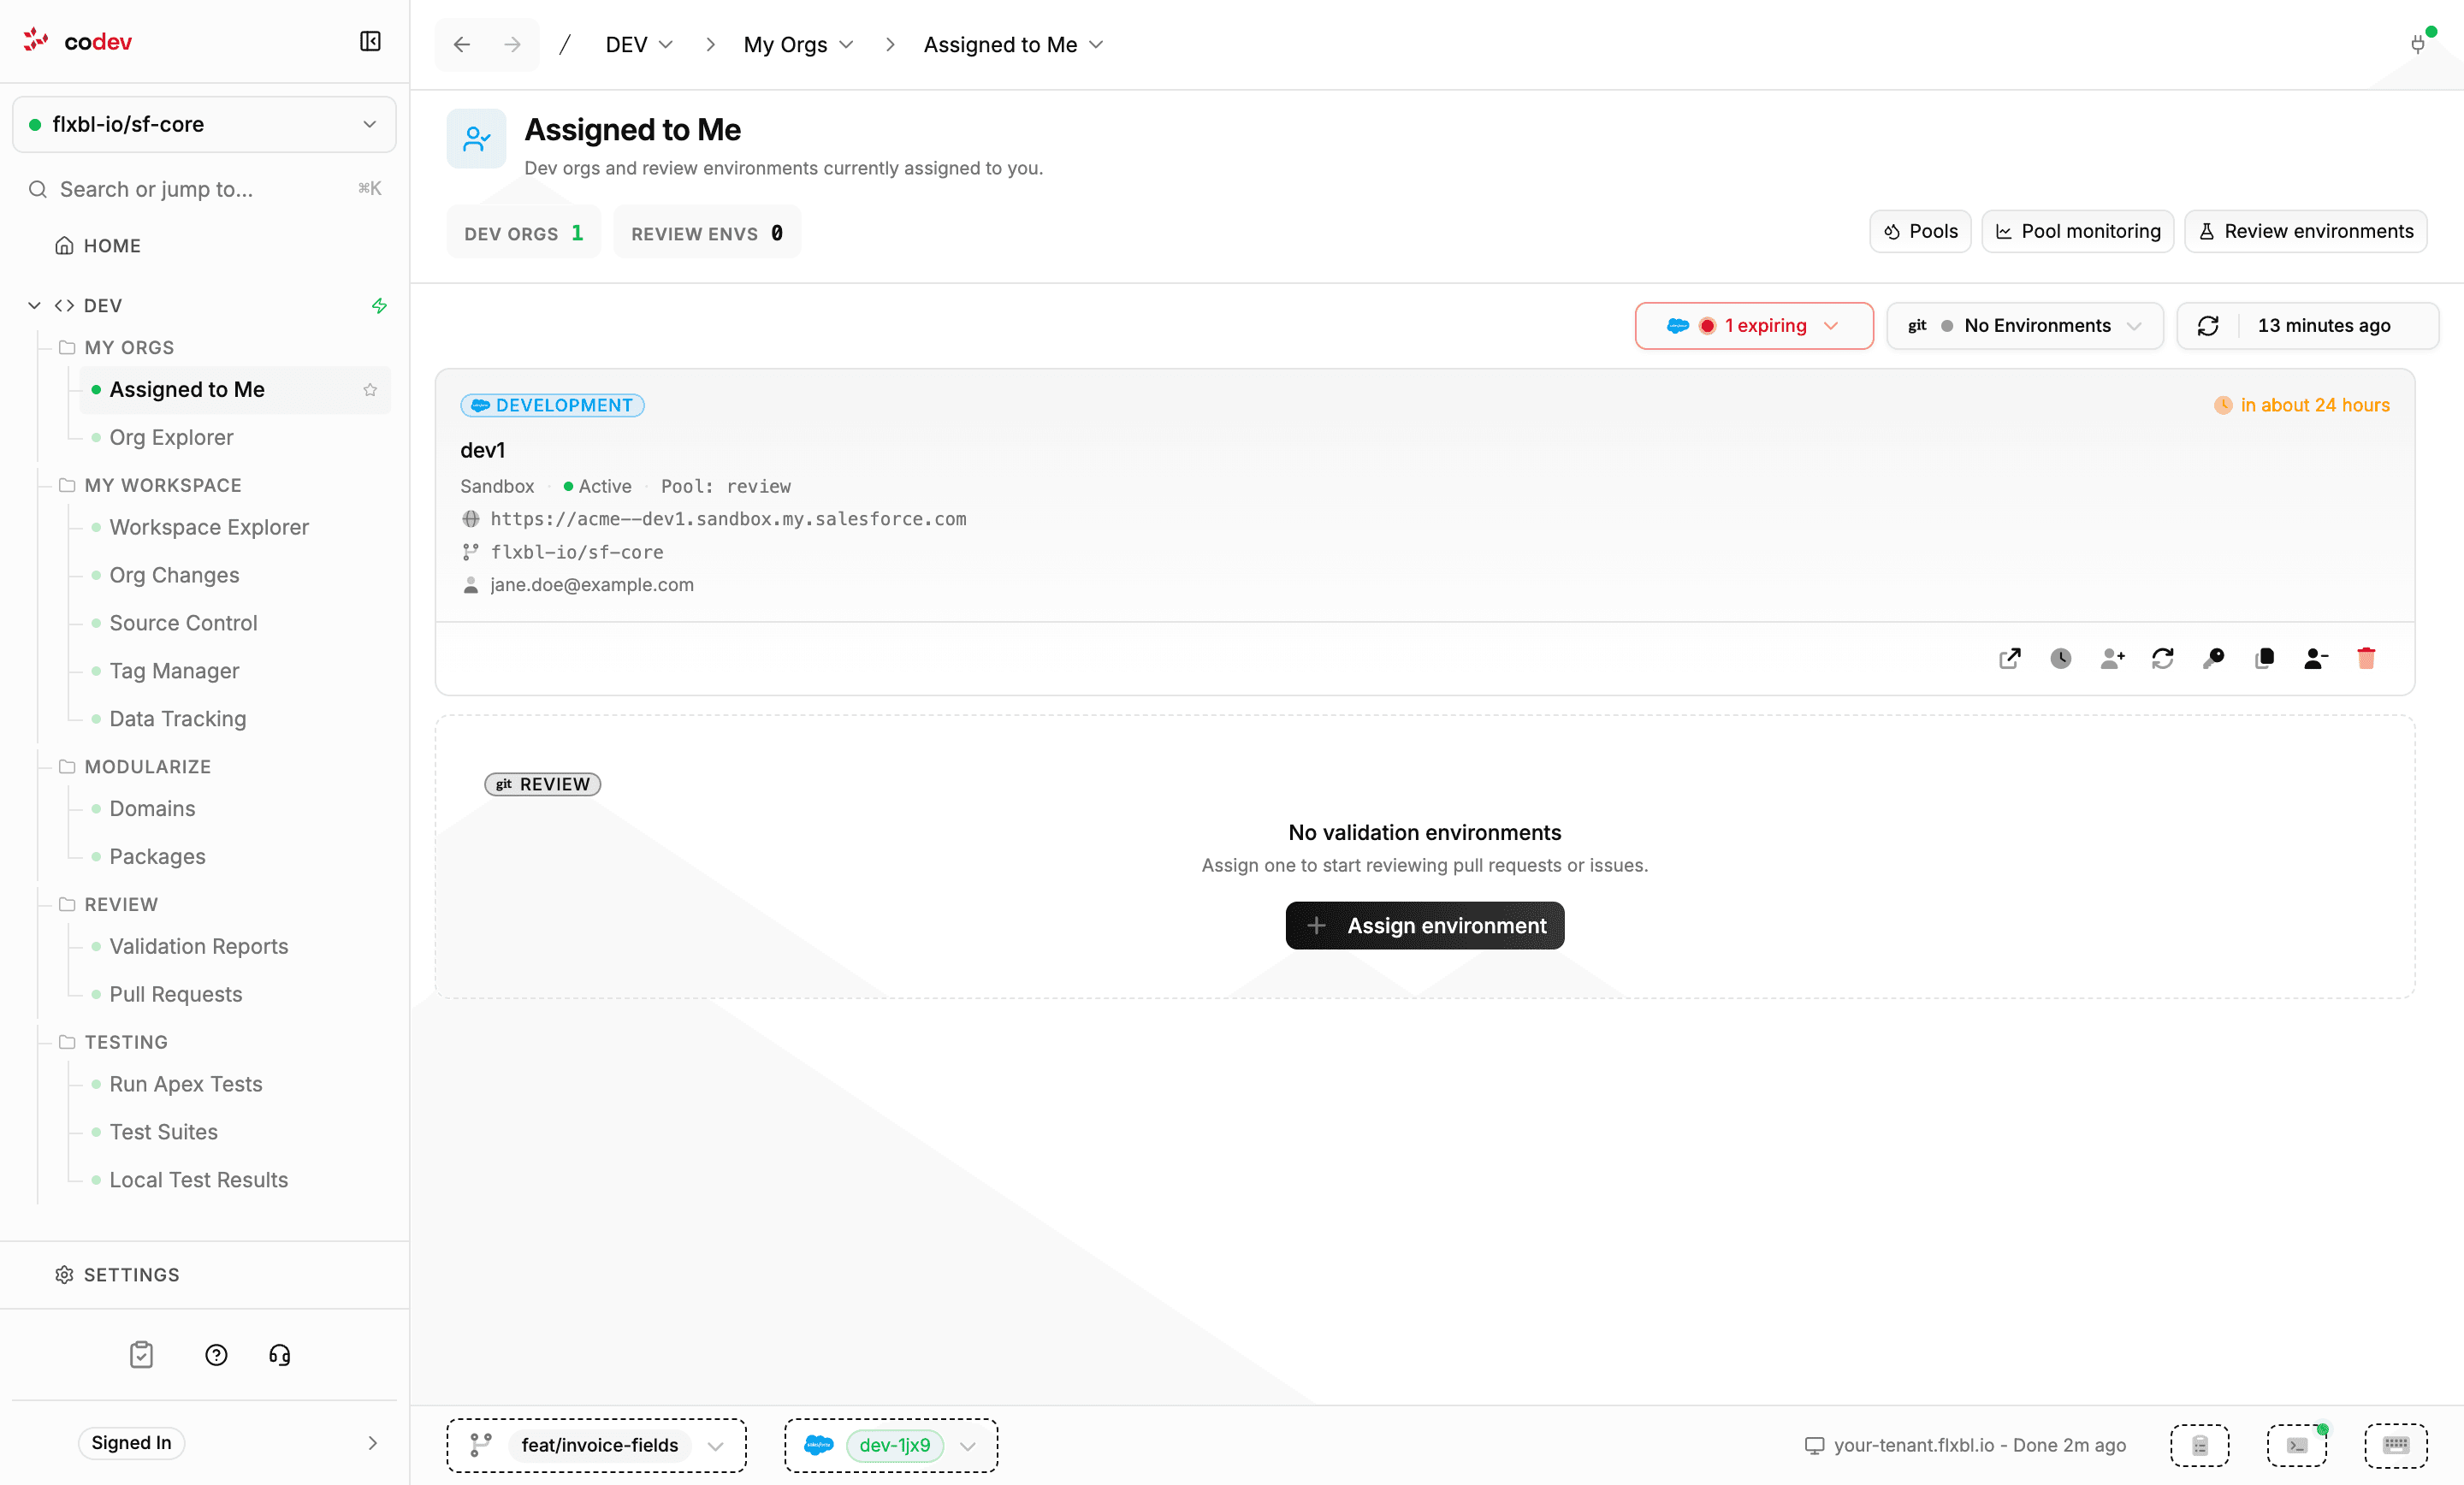
The card's actions open the org in the browser, extend the assignment, refresh its status, or release it back to the pool.
Check the status bar before you continue: the fetched org should be your target org. If it is not, click the org button and select it.
Make changes in your org
Work in the org as you normally would — click Open Org on the Org Changes page (or the open action on the org's card) and build in Setup: objects, fields, layouts, flows, Apex.
See what changed — Org Changes
Dev > My Workspace > Org Changes reads Salesforce source tracking for your target org. Every component you created or changed appears as a row with its type, revision, and who modified it when. Click Refresh after working in the org to pick up the latest changes.
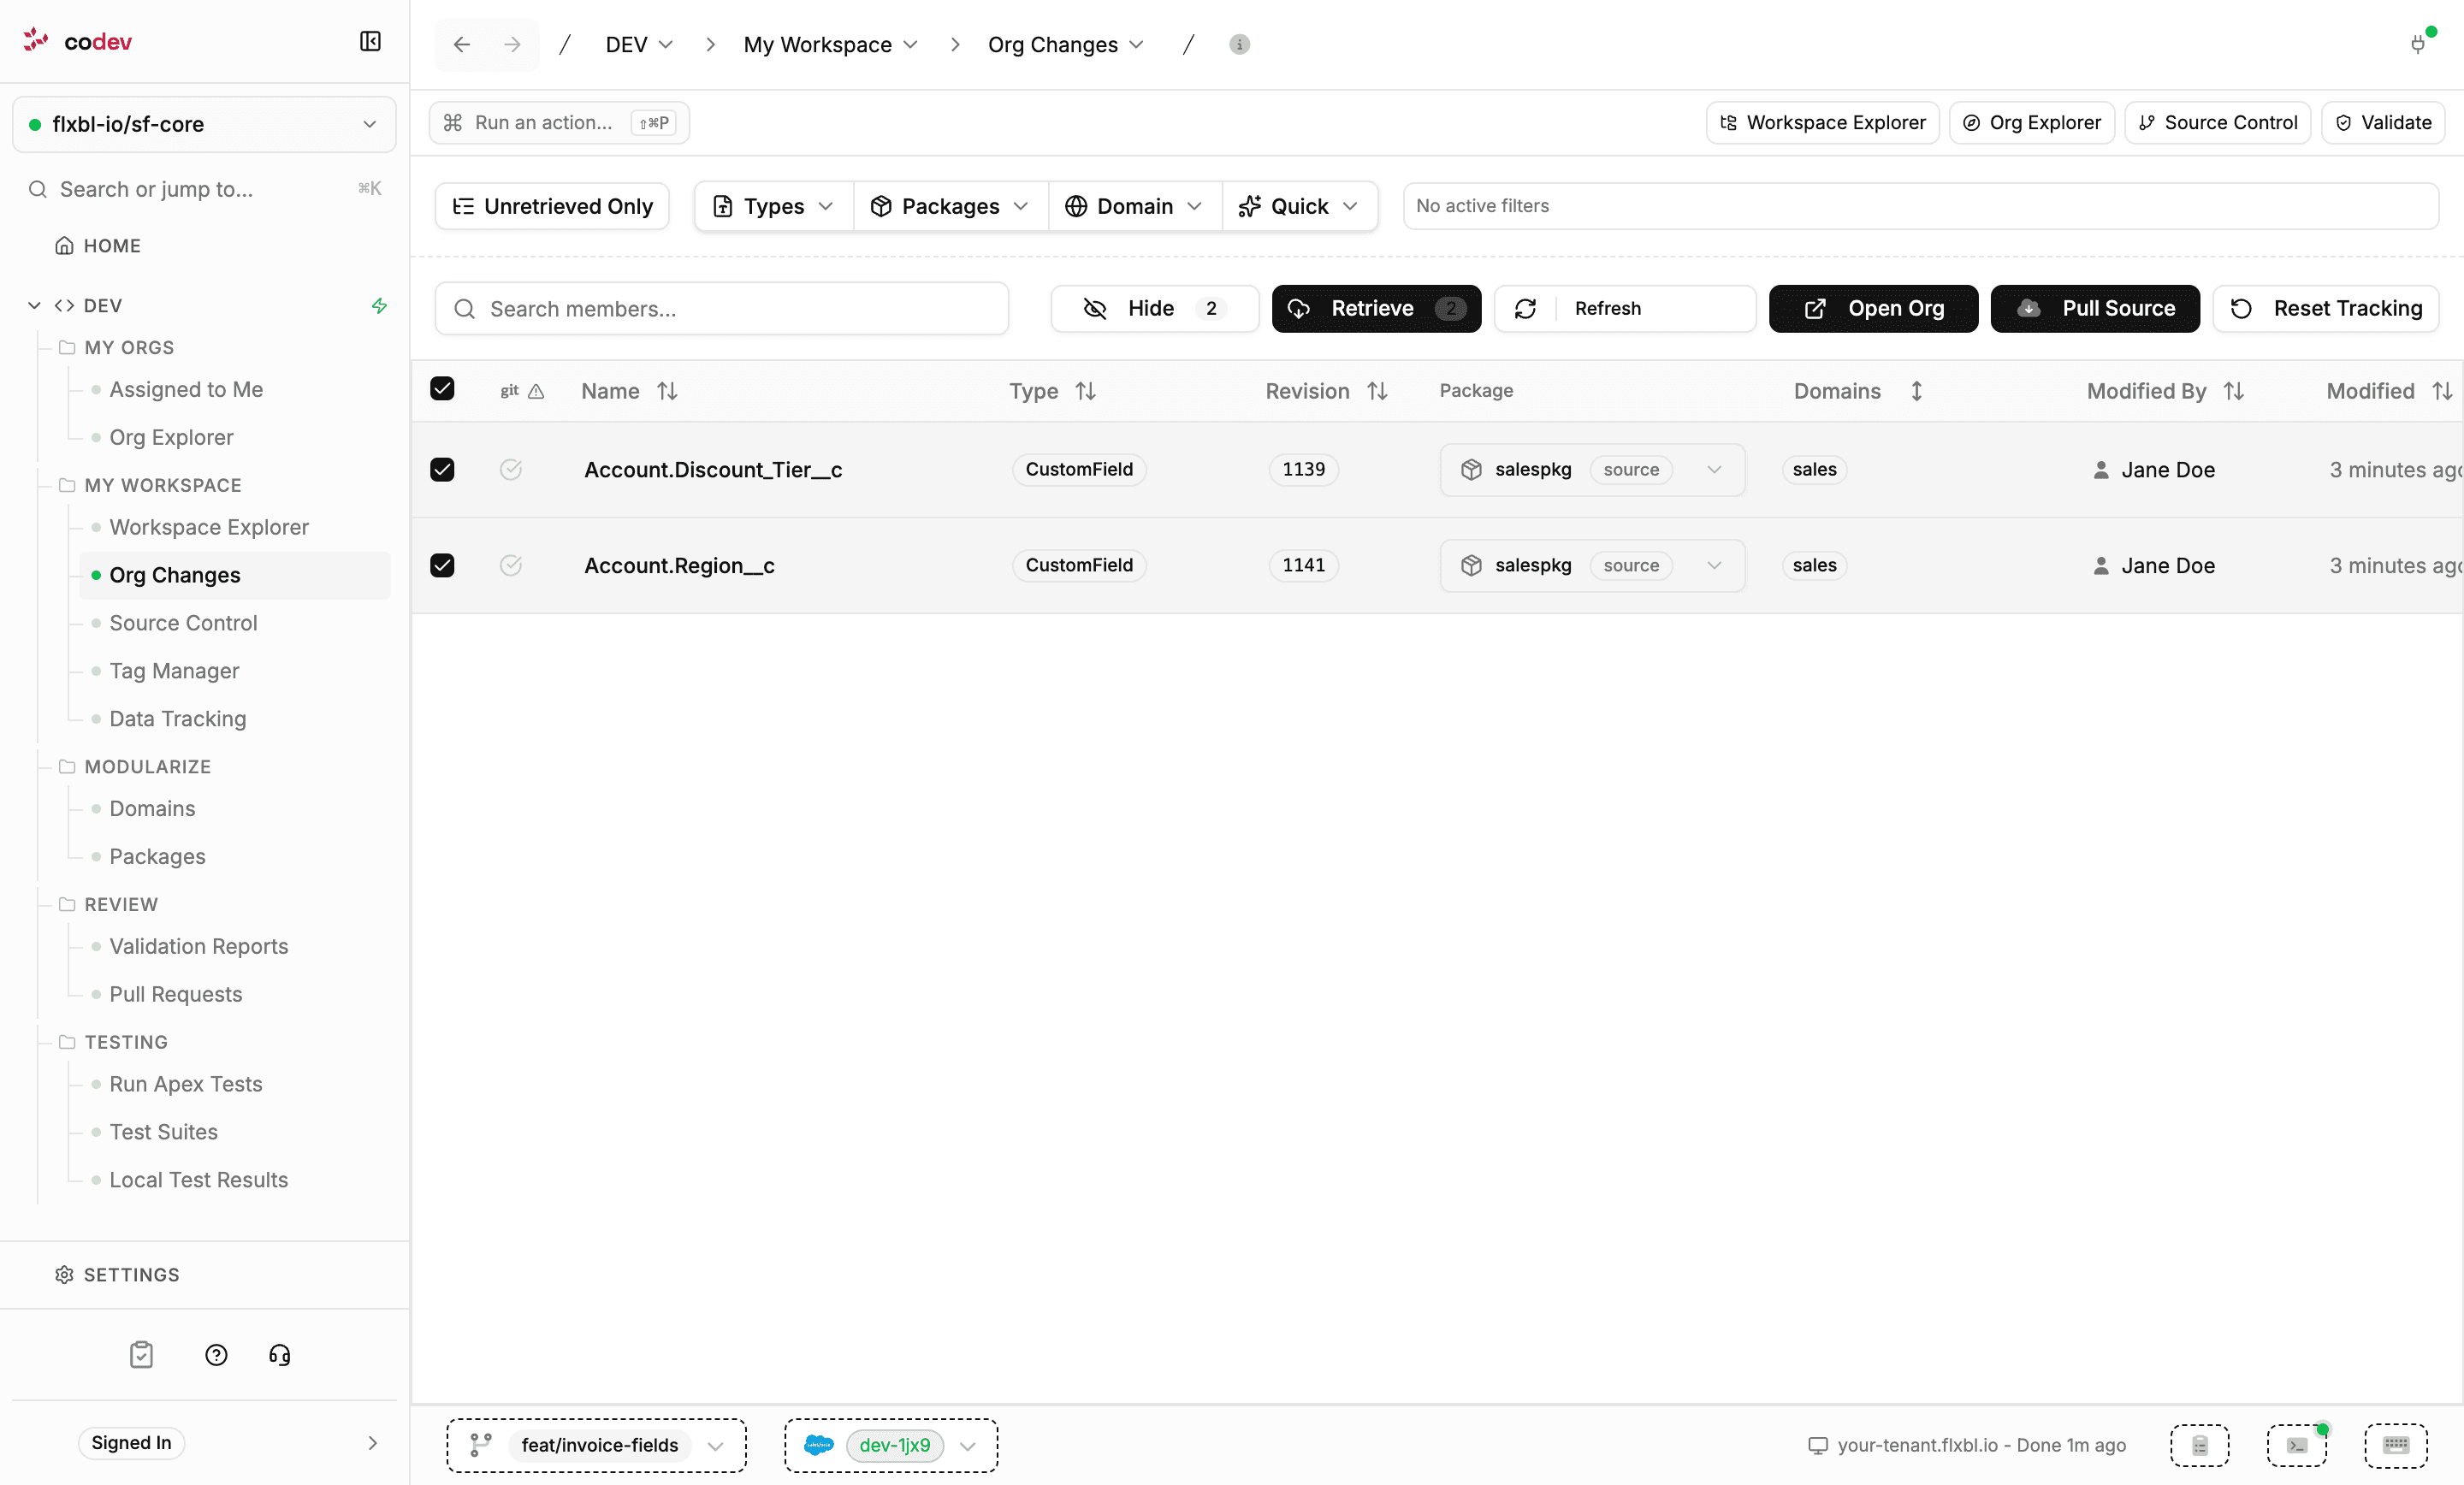
By default the list shows Unretrieved Only — components you have not retrieved yet, or that changed again after your last retrieve. Toggle it to see all tracked items. Filters narrow the list by type, package, or domain.
Two actions manage the list without touching your files:
- Hide dismisses the selected rows without retrieving them — for changes you do not want to keep, such as noise from experimenting.
- Reset Tracking marks everything currently tracked as seen, so the list starts fresh from this point. Neither modifies the org or your workspace.
Retrieve into a package
Each row has a Package selector — the package directory the source file will be written into. The project's default package is preselected; pick the package the change belongs to, and the Domains column follows.
Select the rows and click Retrieve. The files are written into the chosen package directories and show up as new changes in Workspace Explorer and Source Control.
Pull Source is the bulk alternative: it pulls tracked changes in one operation, with a choice of method — everything changed since the last sync (Source Tracking), or all components of a domain or a package.
Commit your work — Source Control
Dev > My Workspace > Source Control is your branch's view. The header shows the branch and its target — for example feat/invoice-fields → main — and three tabs: Changes, Commits & PRs, and Sync.
The Changes tab lists your working-tree changes with their metadata type, package, and domain. Hovering a file offers View diff, Open in editor, Deploy to org, Stage, and Discard changes.
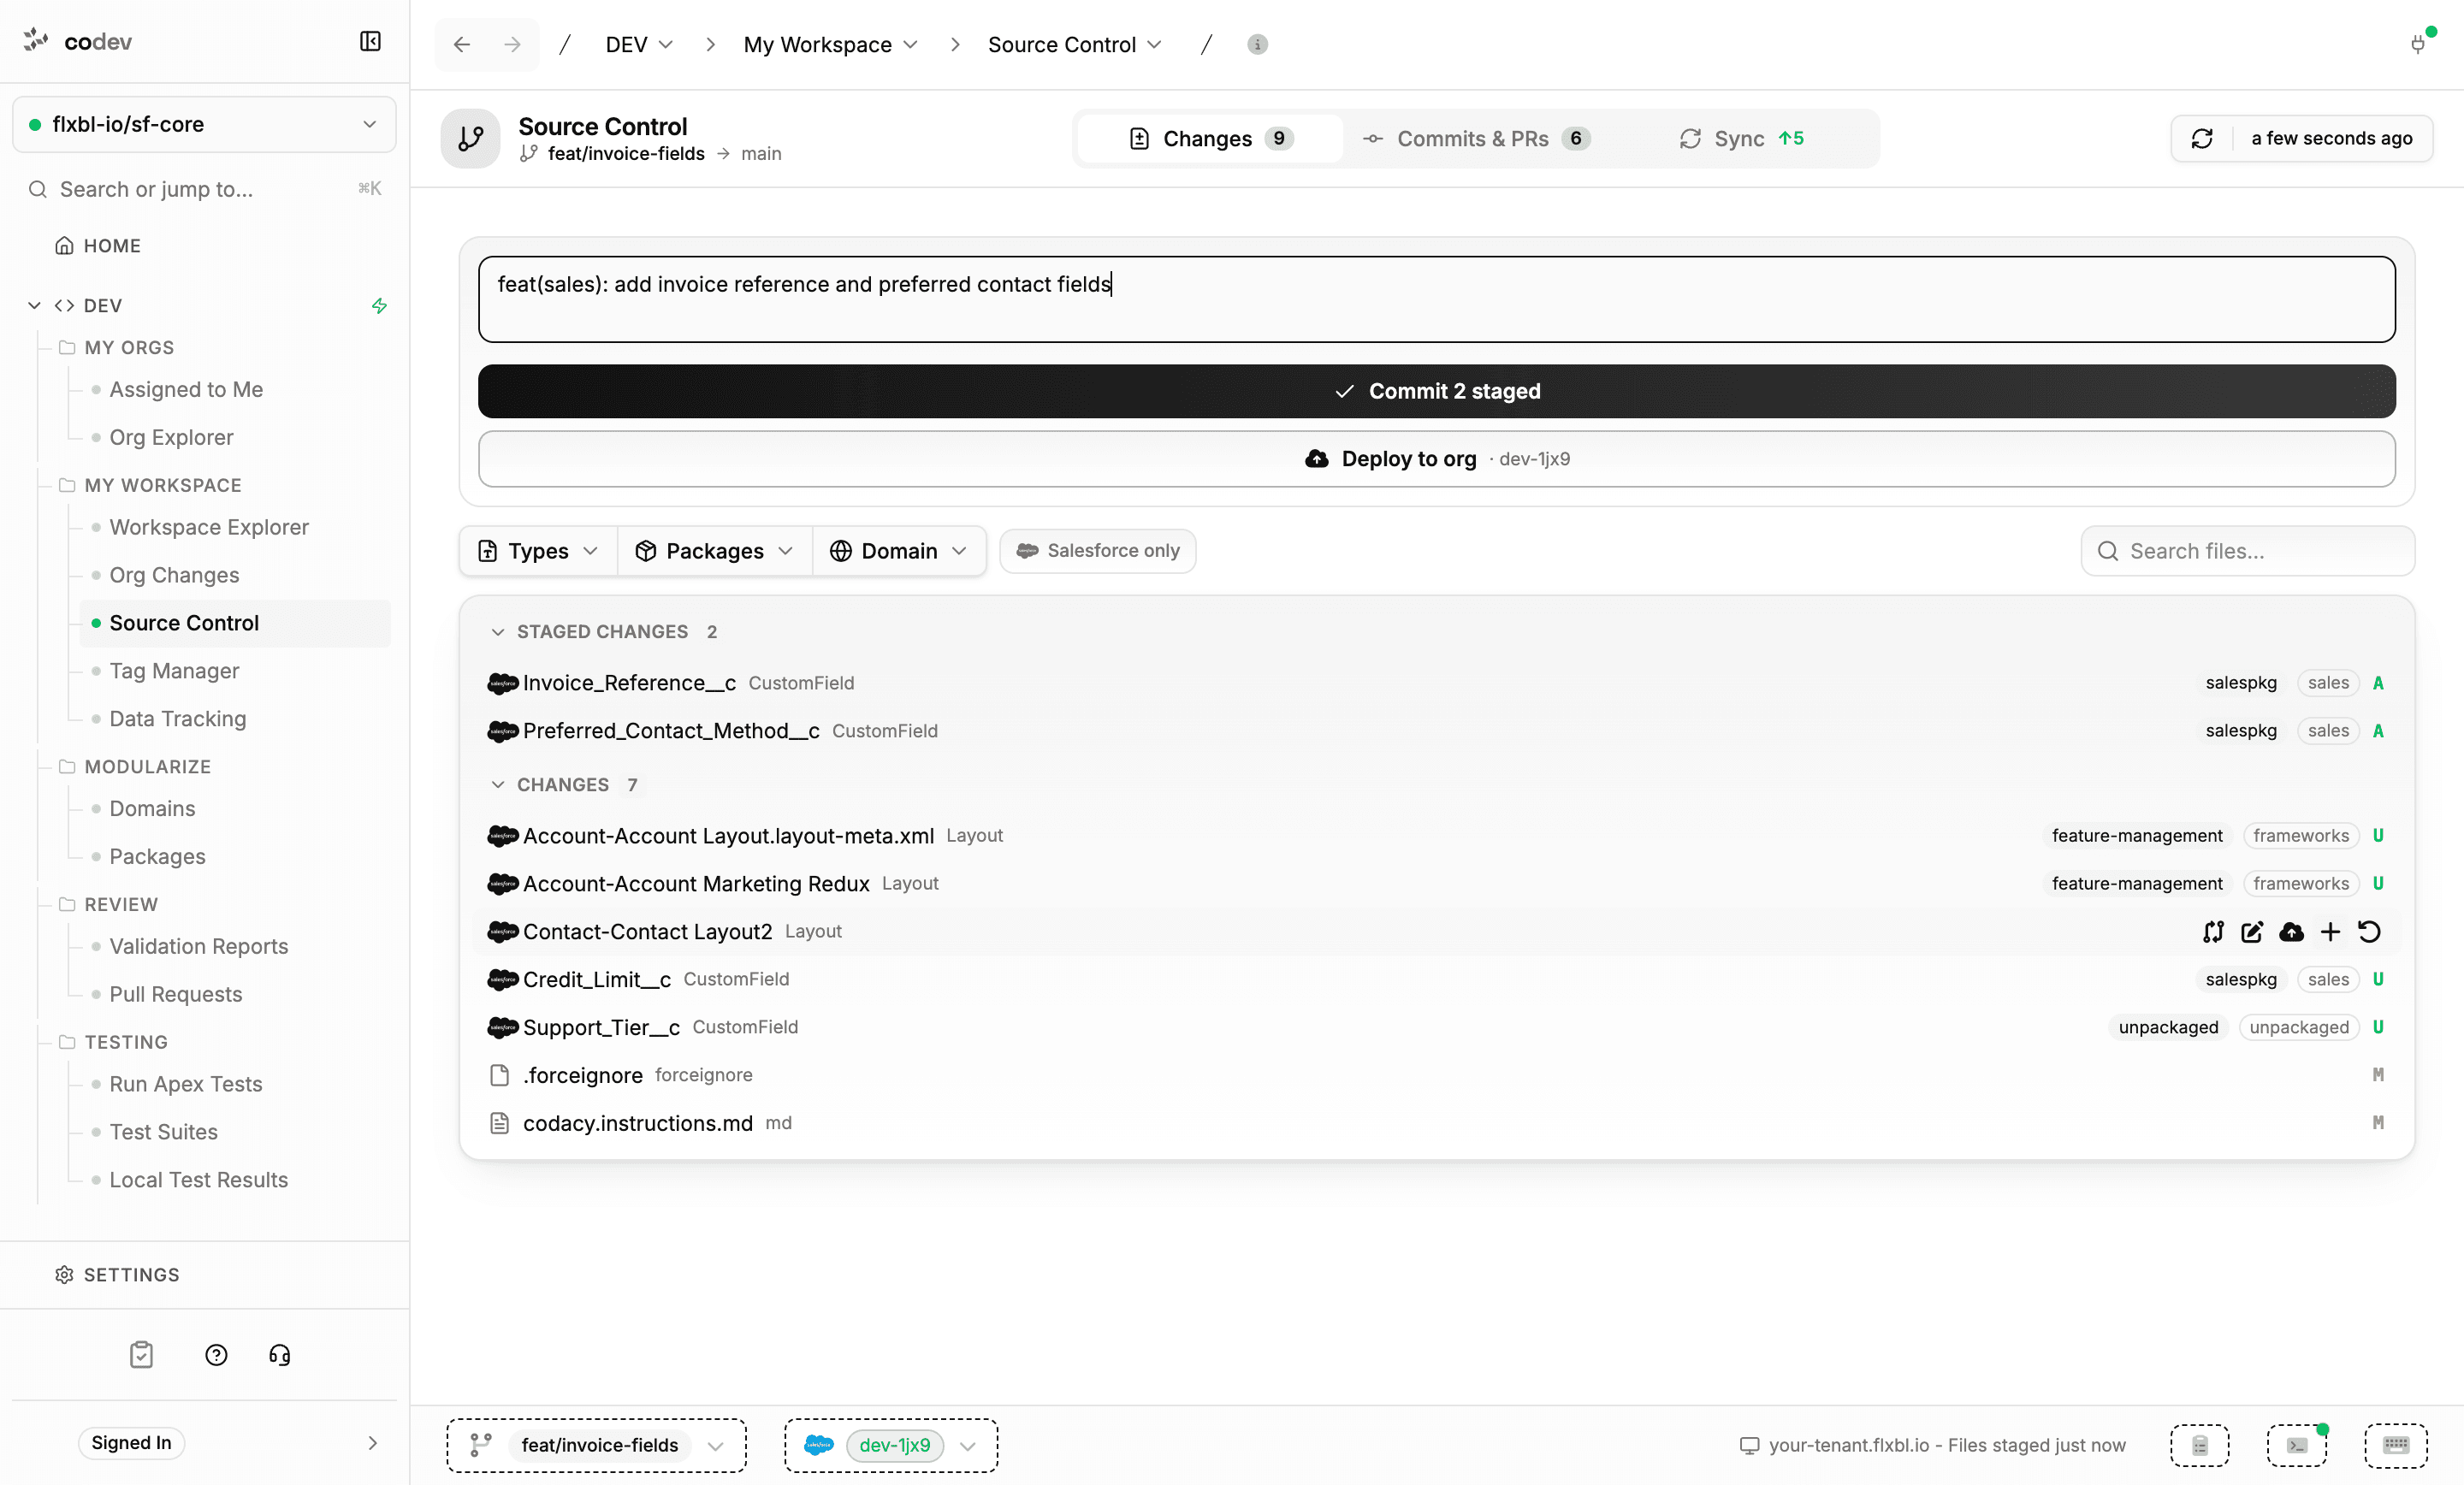
Stage the files that belong together, write a message, and click Commit — the commit includes only the staged files, so you can split unrelated changes into separate commits.
Stay in sync
The Sync tab keeps your branch current. The counters show how far you are behind the remote, ahead of it, and behind the target branch, and the steps below run in order:
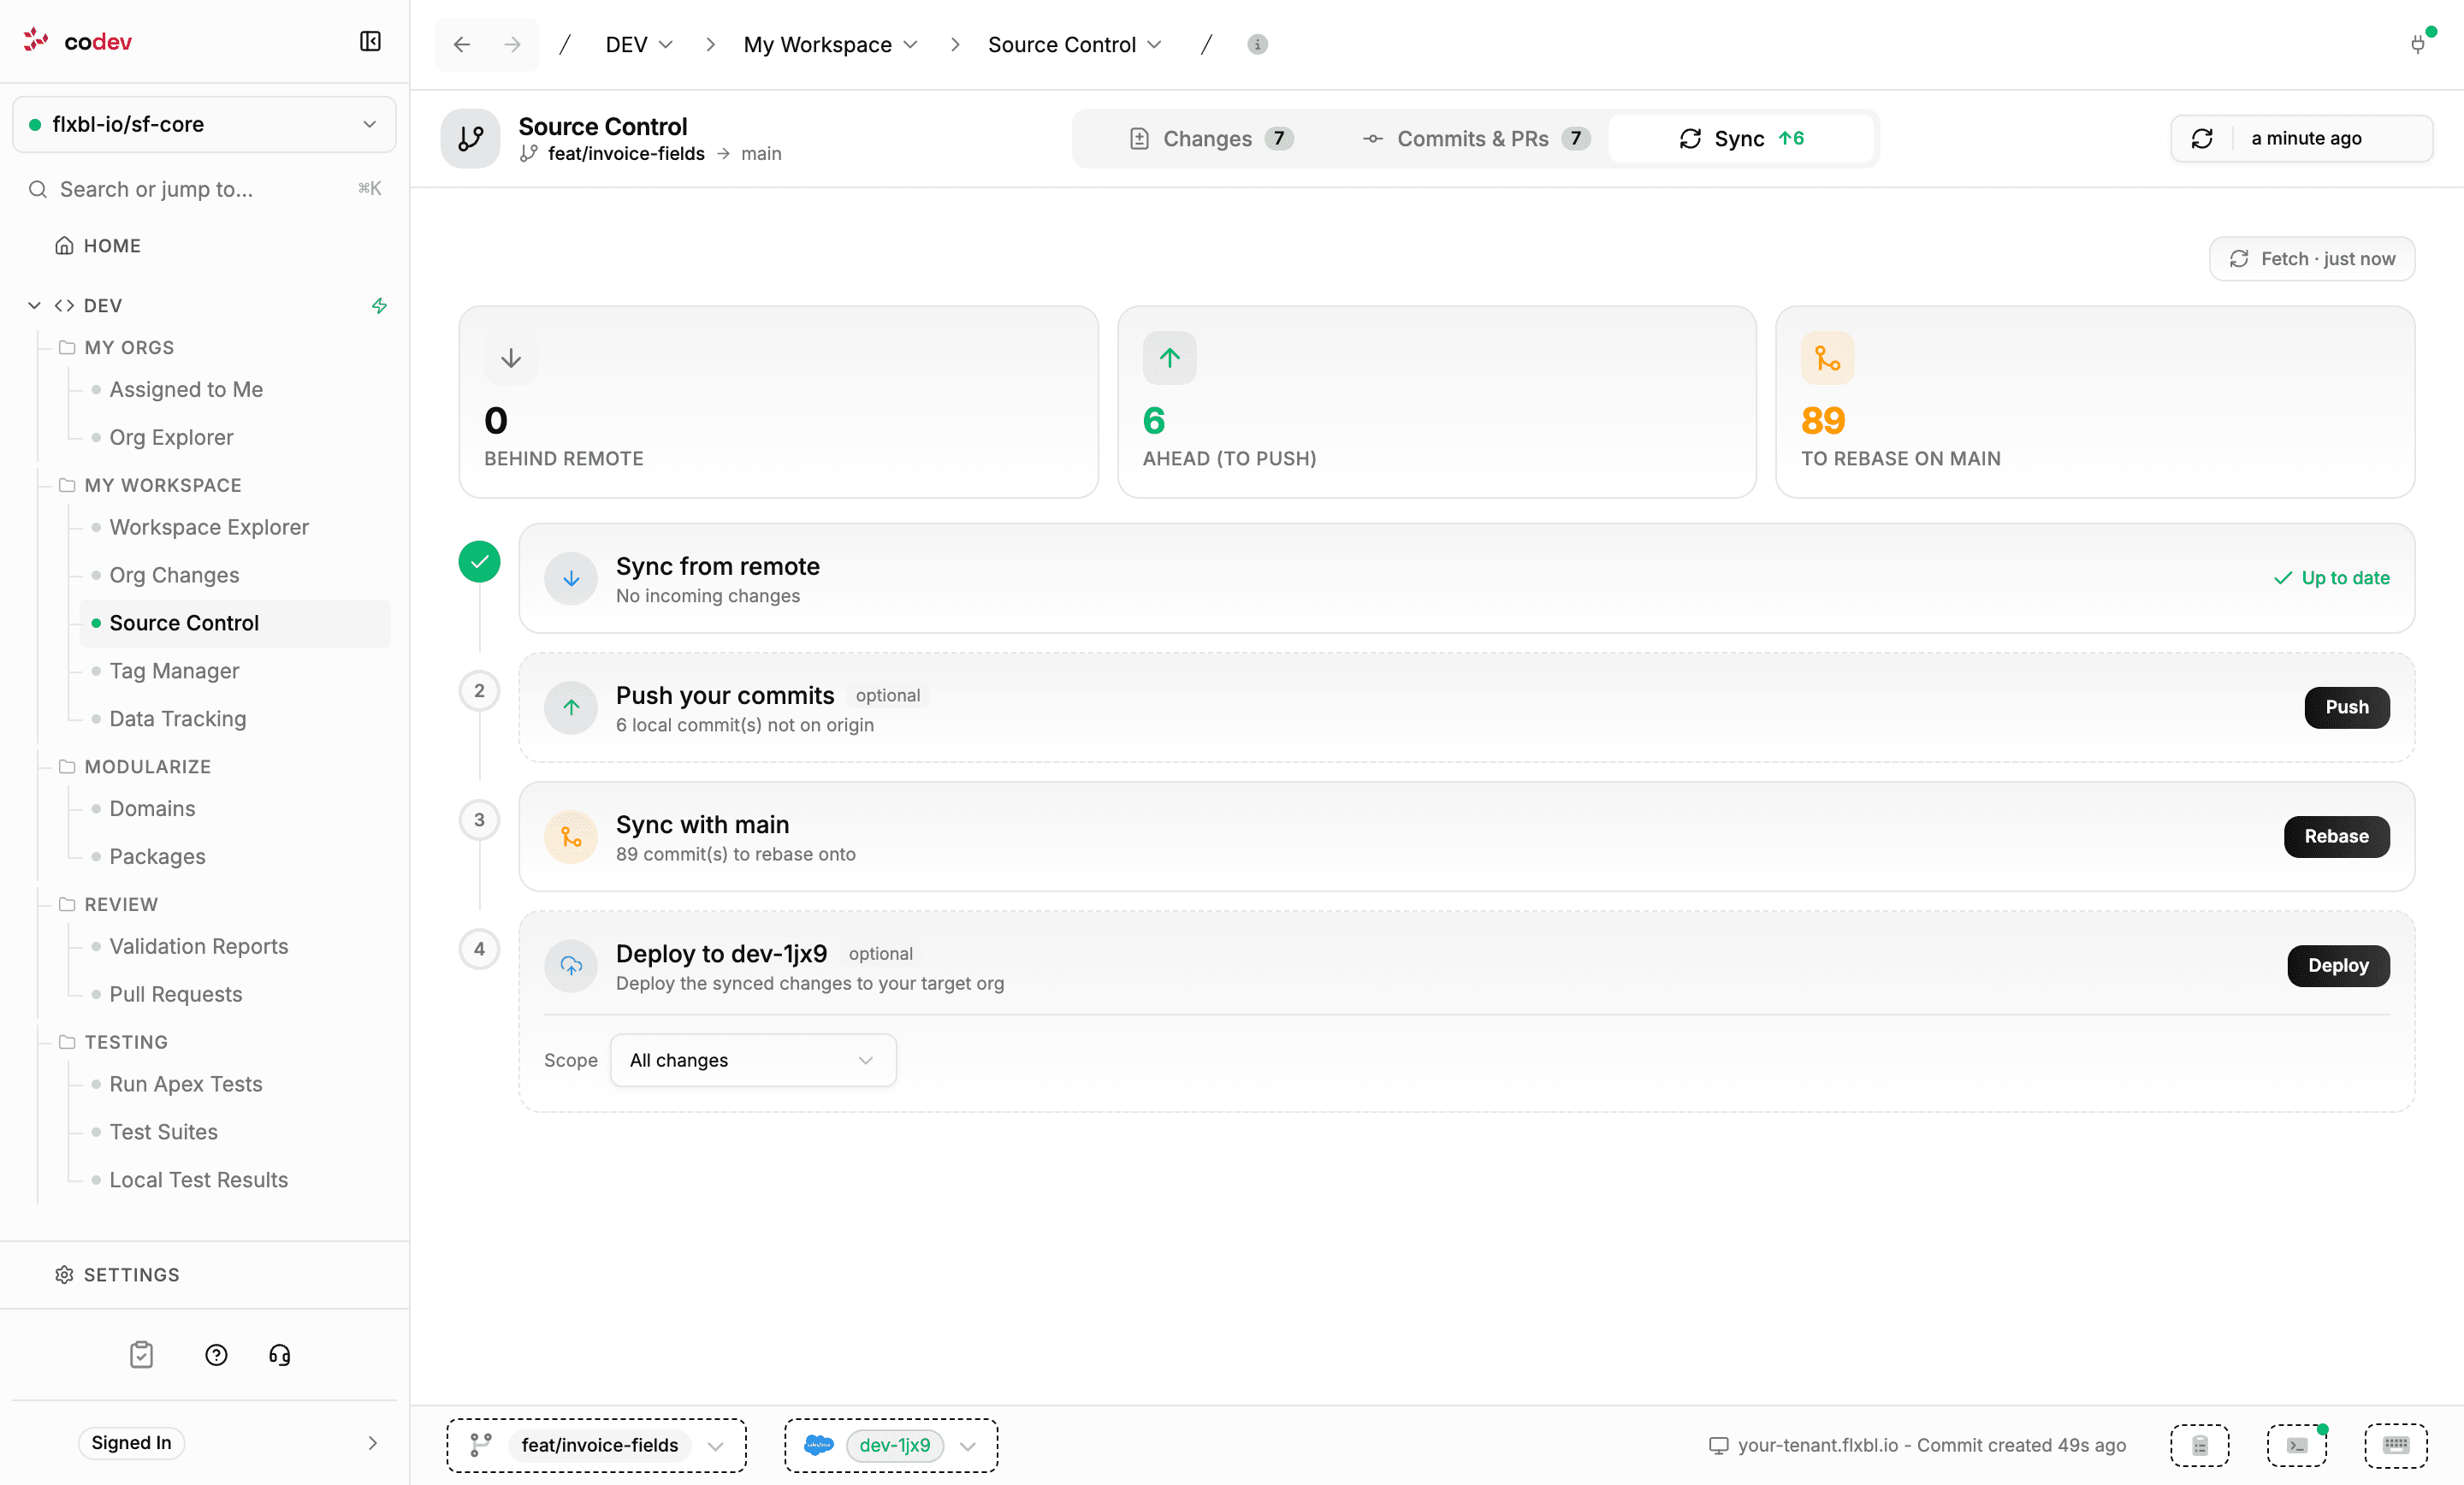
- Sync from remote — pull incoming changes. Conflicts open the conflict resolver.
- Push your commits — push your local commits; a branch without a remote counterpart is published.
- Sync with main — rebase your branch onto the target branch.
- Deploy to your target org (optional) — bring the org up to date with the synced branch. codev compares what is installed in the org against the branch and deploys only the packages that differ; the Scope selector limits the comparison to one domain's packages.
Validate a commit
The Commits & PRs tab lists the commits your branch is ahead of the target branch, newest first, together with the branch's pull requests. Each commit carries a validation status: Not validated, Validating, Passed, or Failed.
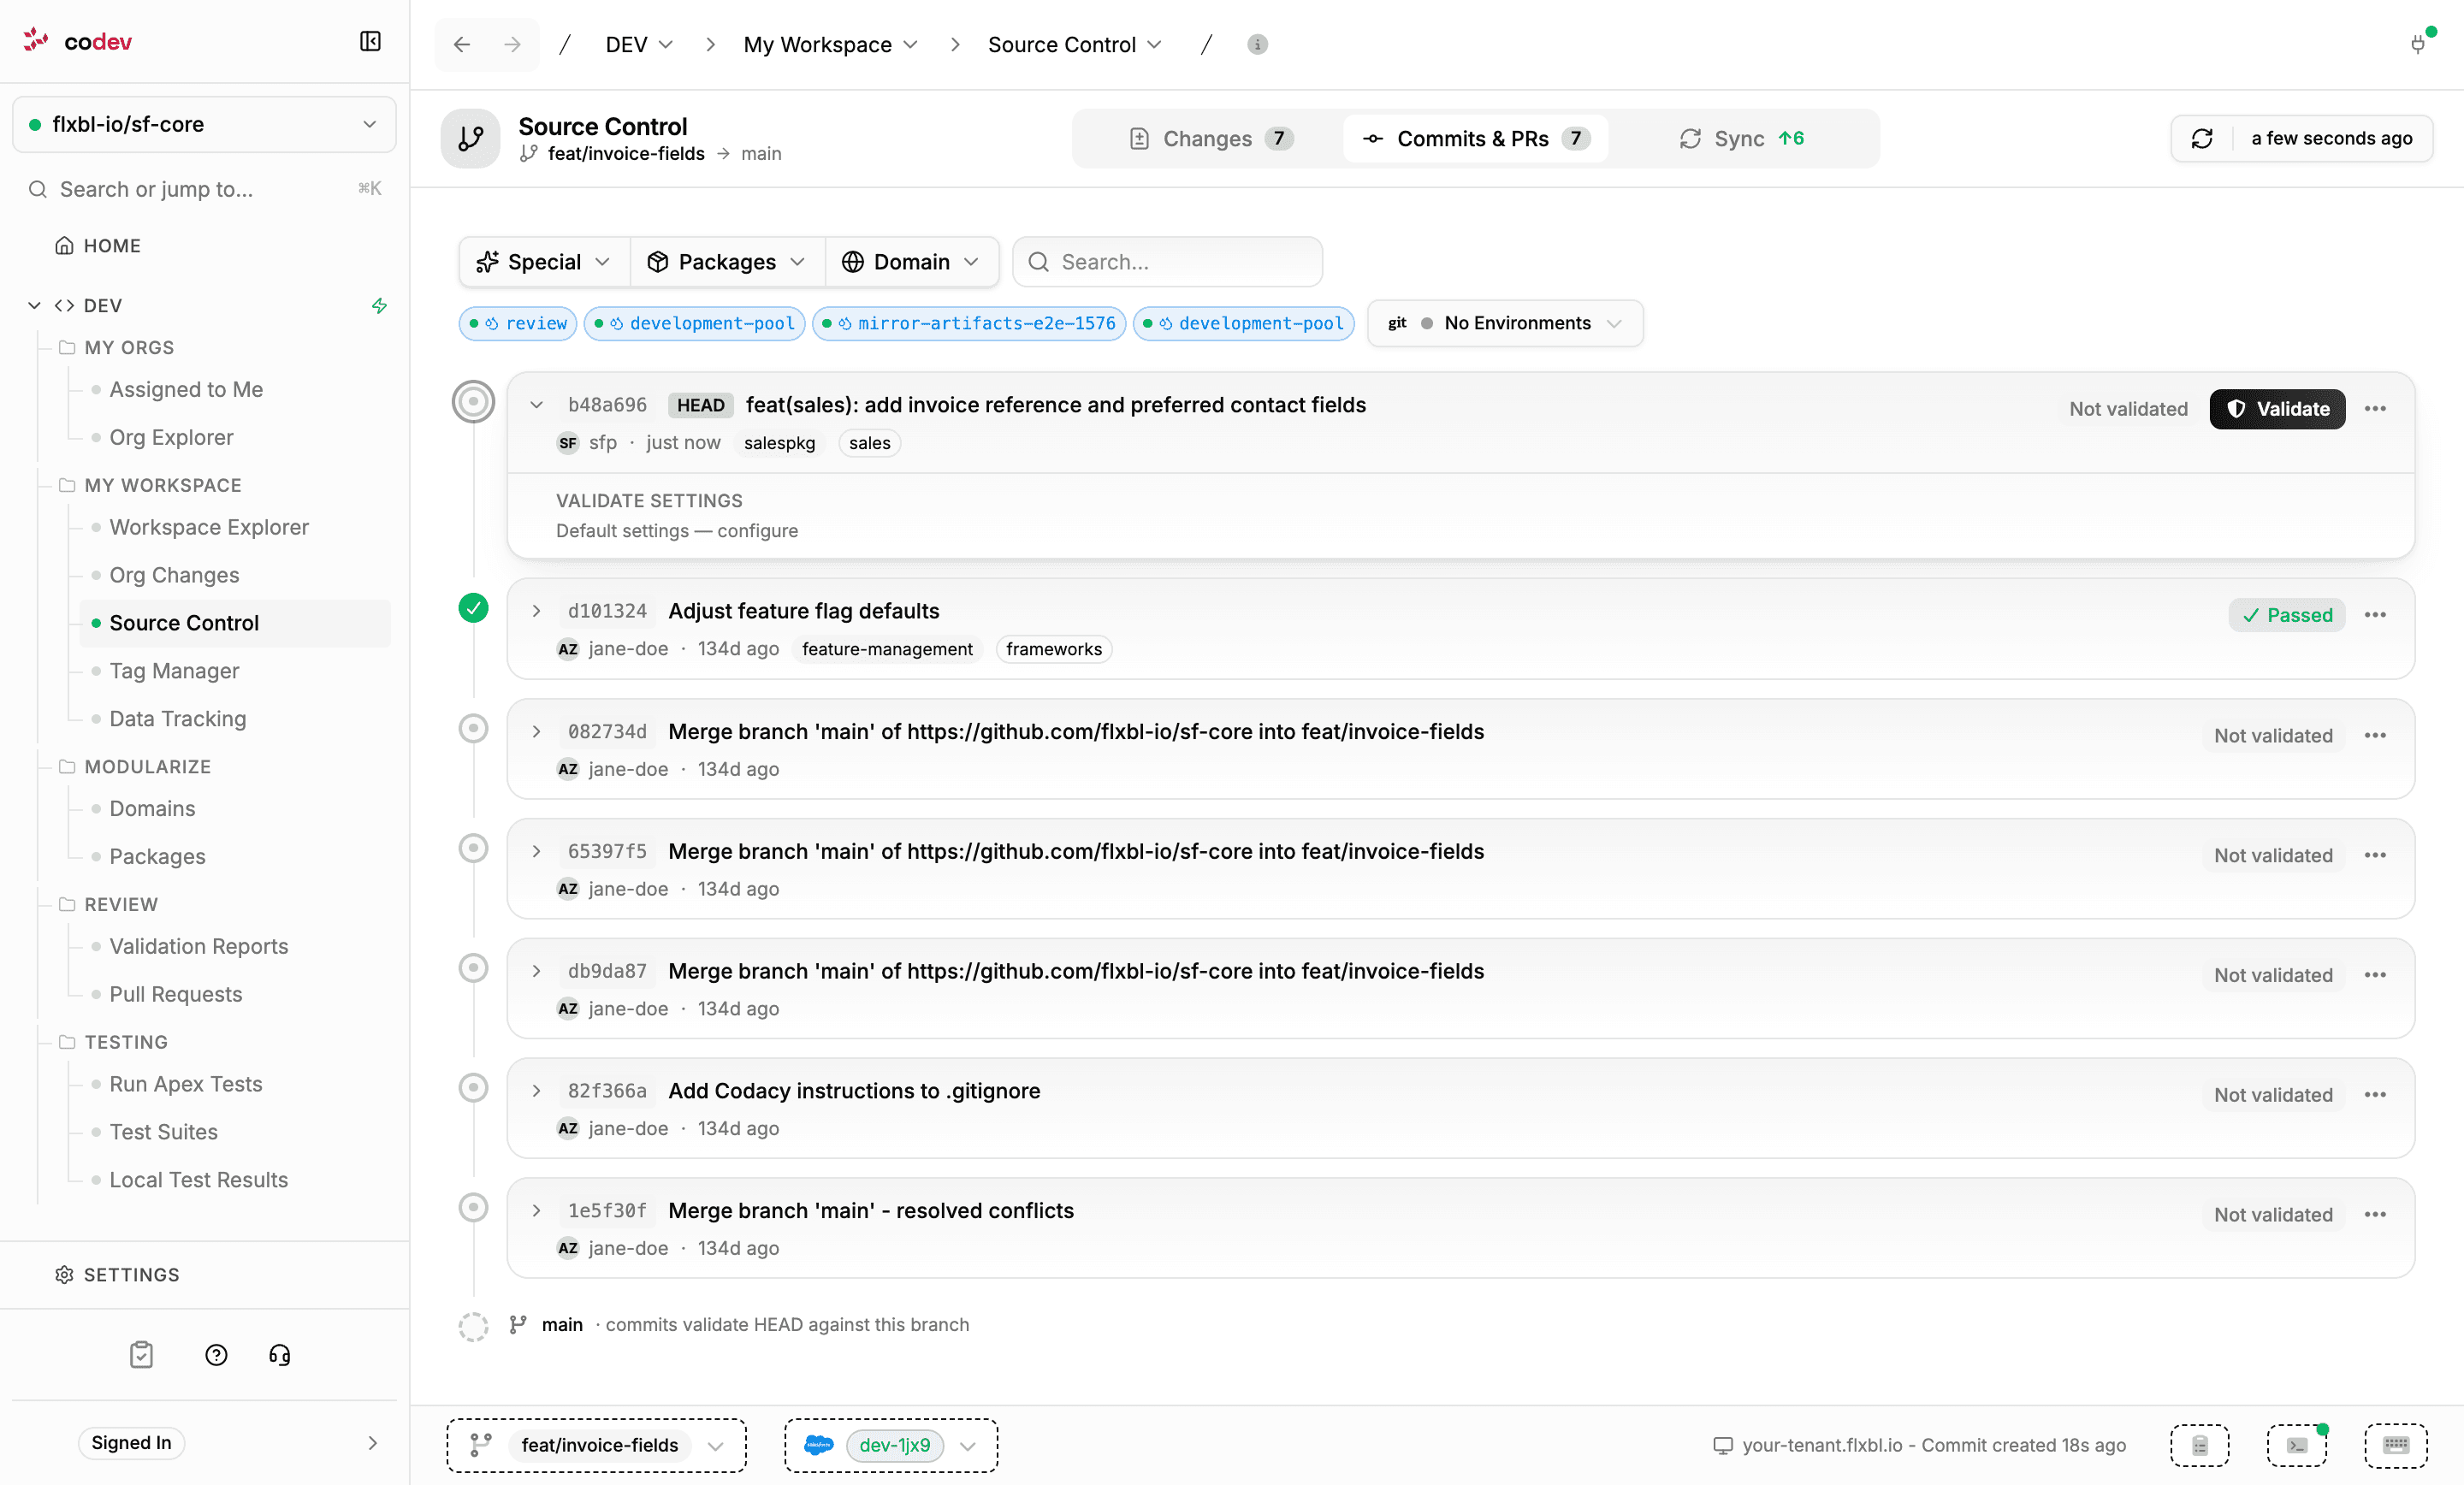
Validate runs a validation of that commit against a review environment: the changed packages are built and deployed there, and Apex tests run. Pick the review environment and a DevHub in the dialog — if you hold no review environment yet, assign one first (see Review environments). The chips above the list show the review environment pools and the health of the environments you hold.
Expanding a commit shows the validate settings used and the result counts — test failures, coverage warnings, and deploy errors. This is the same check a pull request goes through, run early on your own commit.
Create a pull request
When the branch is pushed, open the commit's actions menu (⋯) and choose Create pull request. The action is disabled while the branch already has an open pull request; open pull requests appear in the same timeline with their check status.
From here the pull request follows your project's CI/CD flow — validation on the pull request, and builds once it merges. See CI/CD Getting Started.
Deploy to your org
Deployment also works in the other direction — from your workspace to an org. Deploy to org on the Changes tab (also available per file, and as the last step of Sync) opens the Push Source dialog:
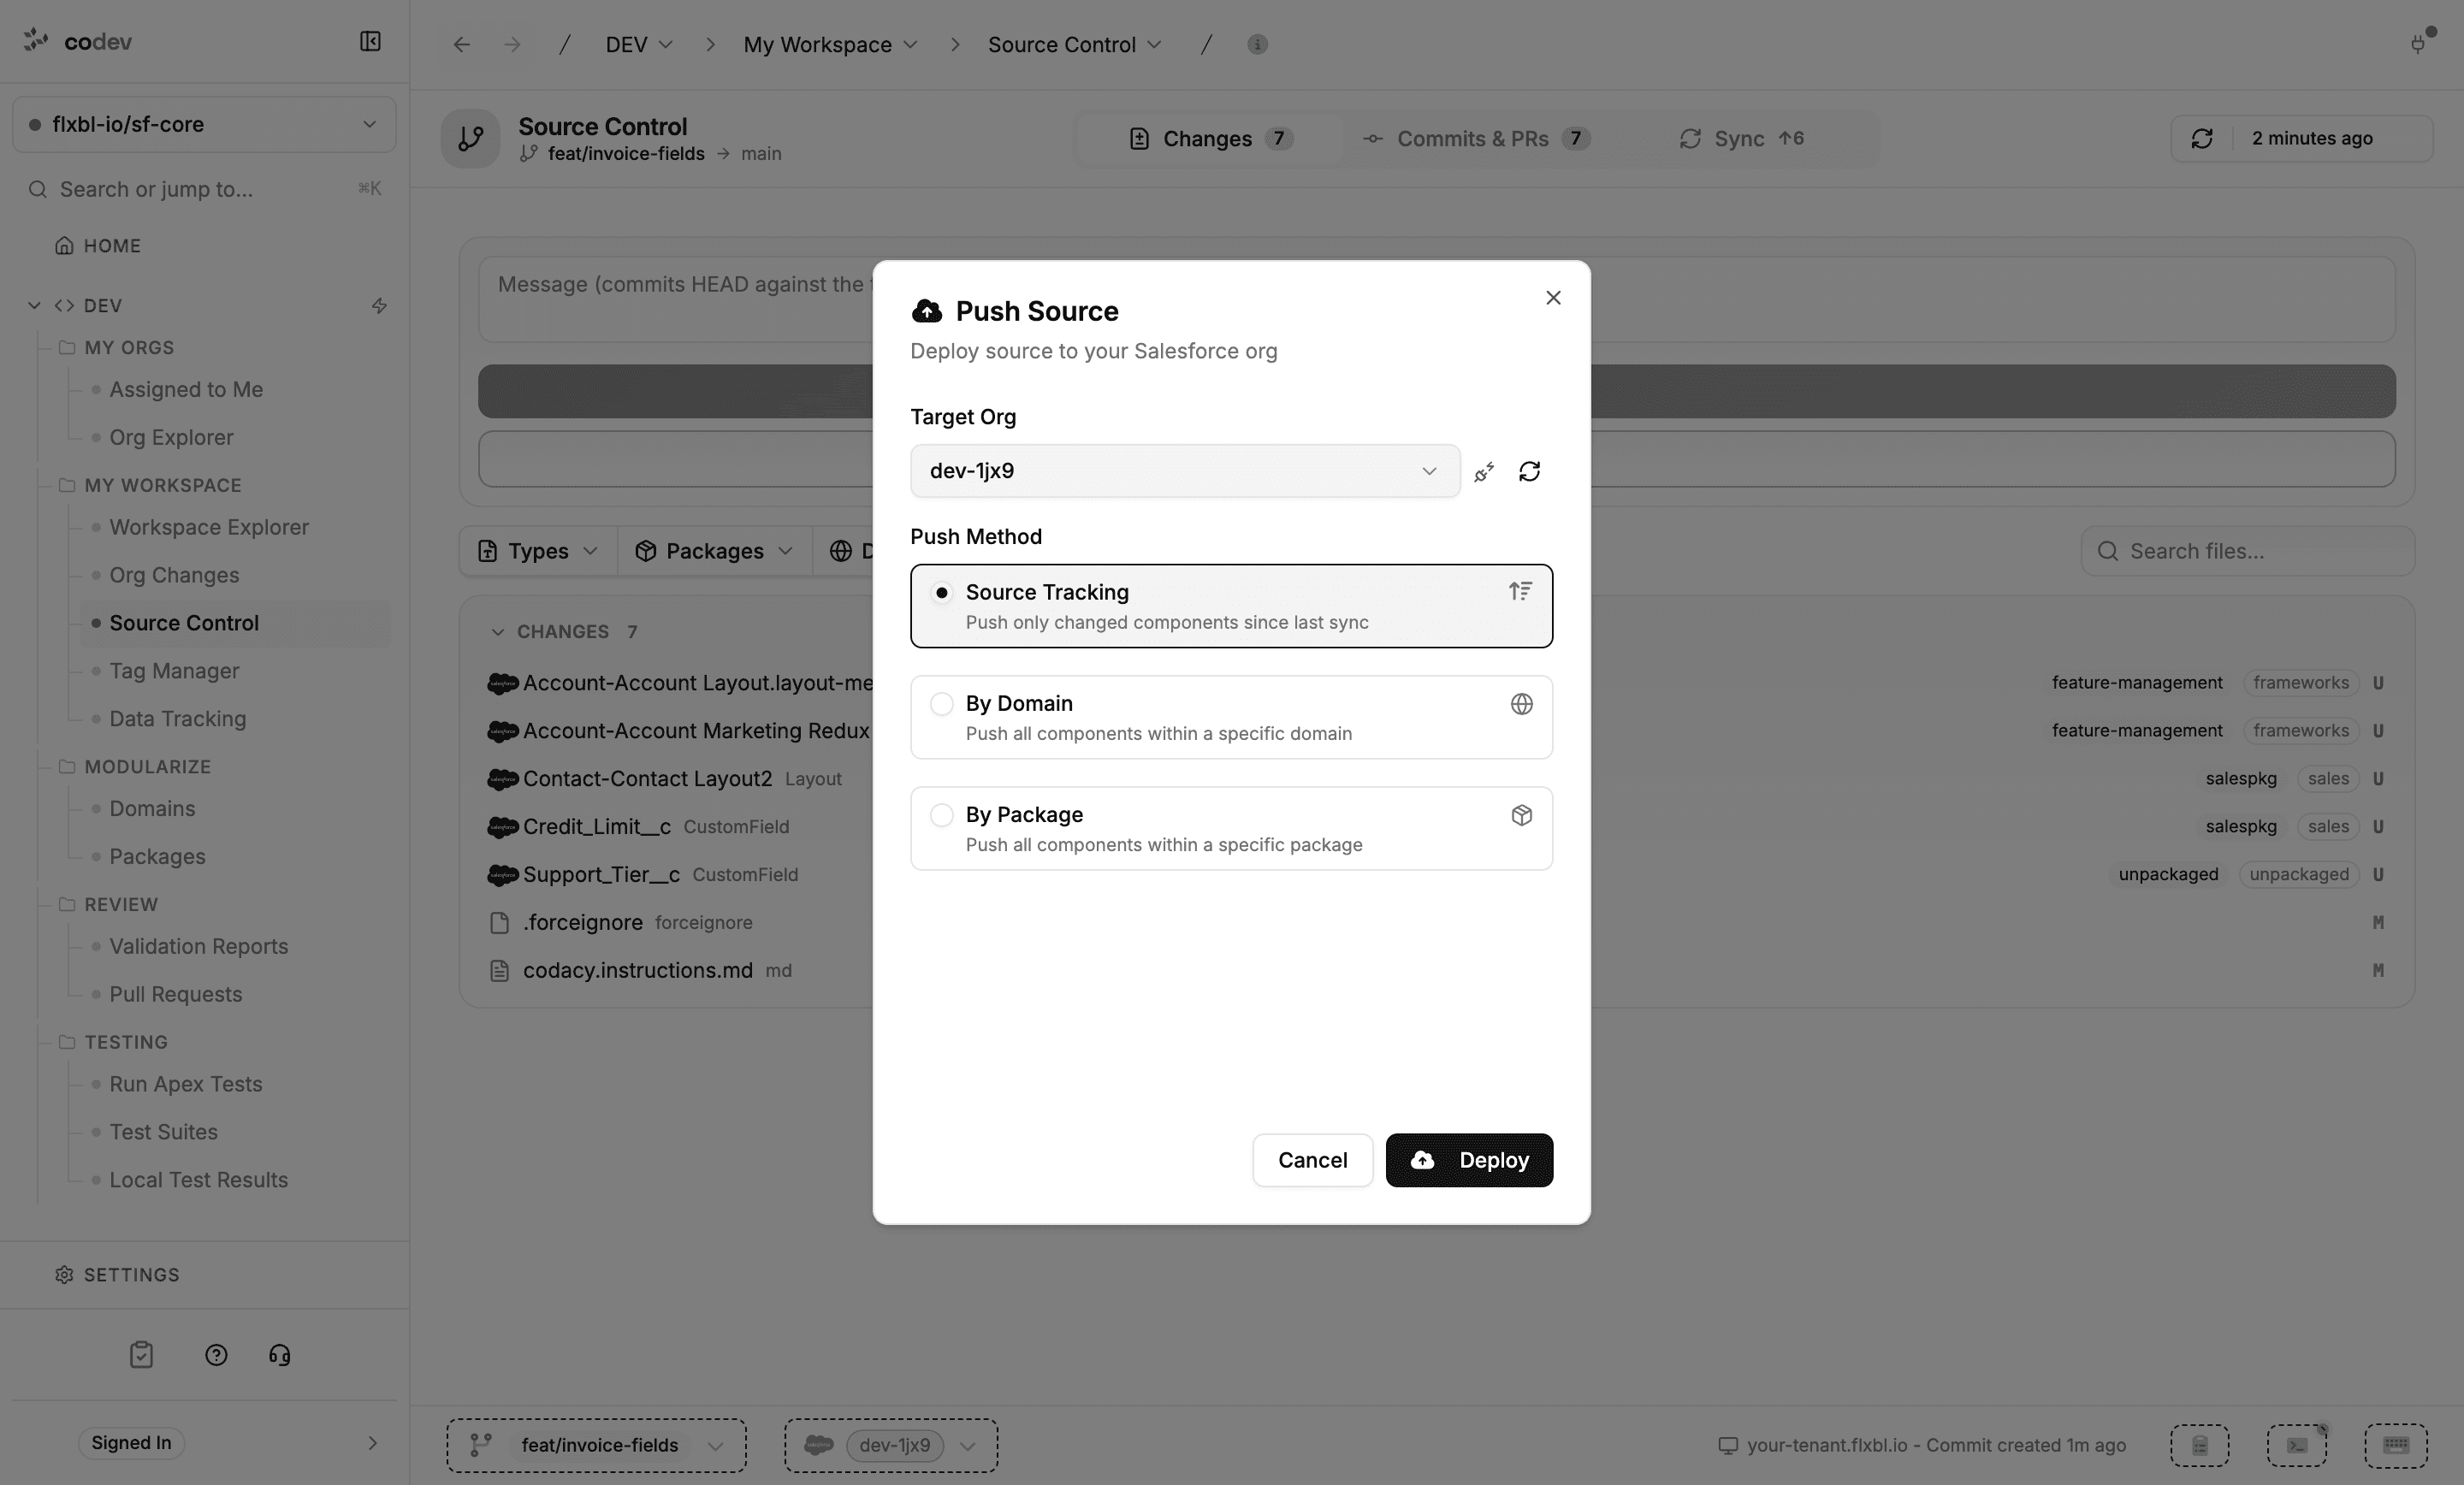
Pick the Target Org — it defaults to your target org, and the dialog checks the connection live — and the Push Method: only components changed since the last sync (Source Tracking), everything in a domain or a package, or the files you had selected (Selected Files).
Use this to move work between your orgs, or to bring a freshly fetched org up to date with changes you have not yet merged.