Fetching and Using Environments
Once a pool is provisioned and has available instances, your team can start using them.
Fetching an environment
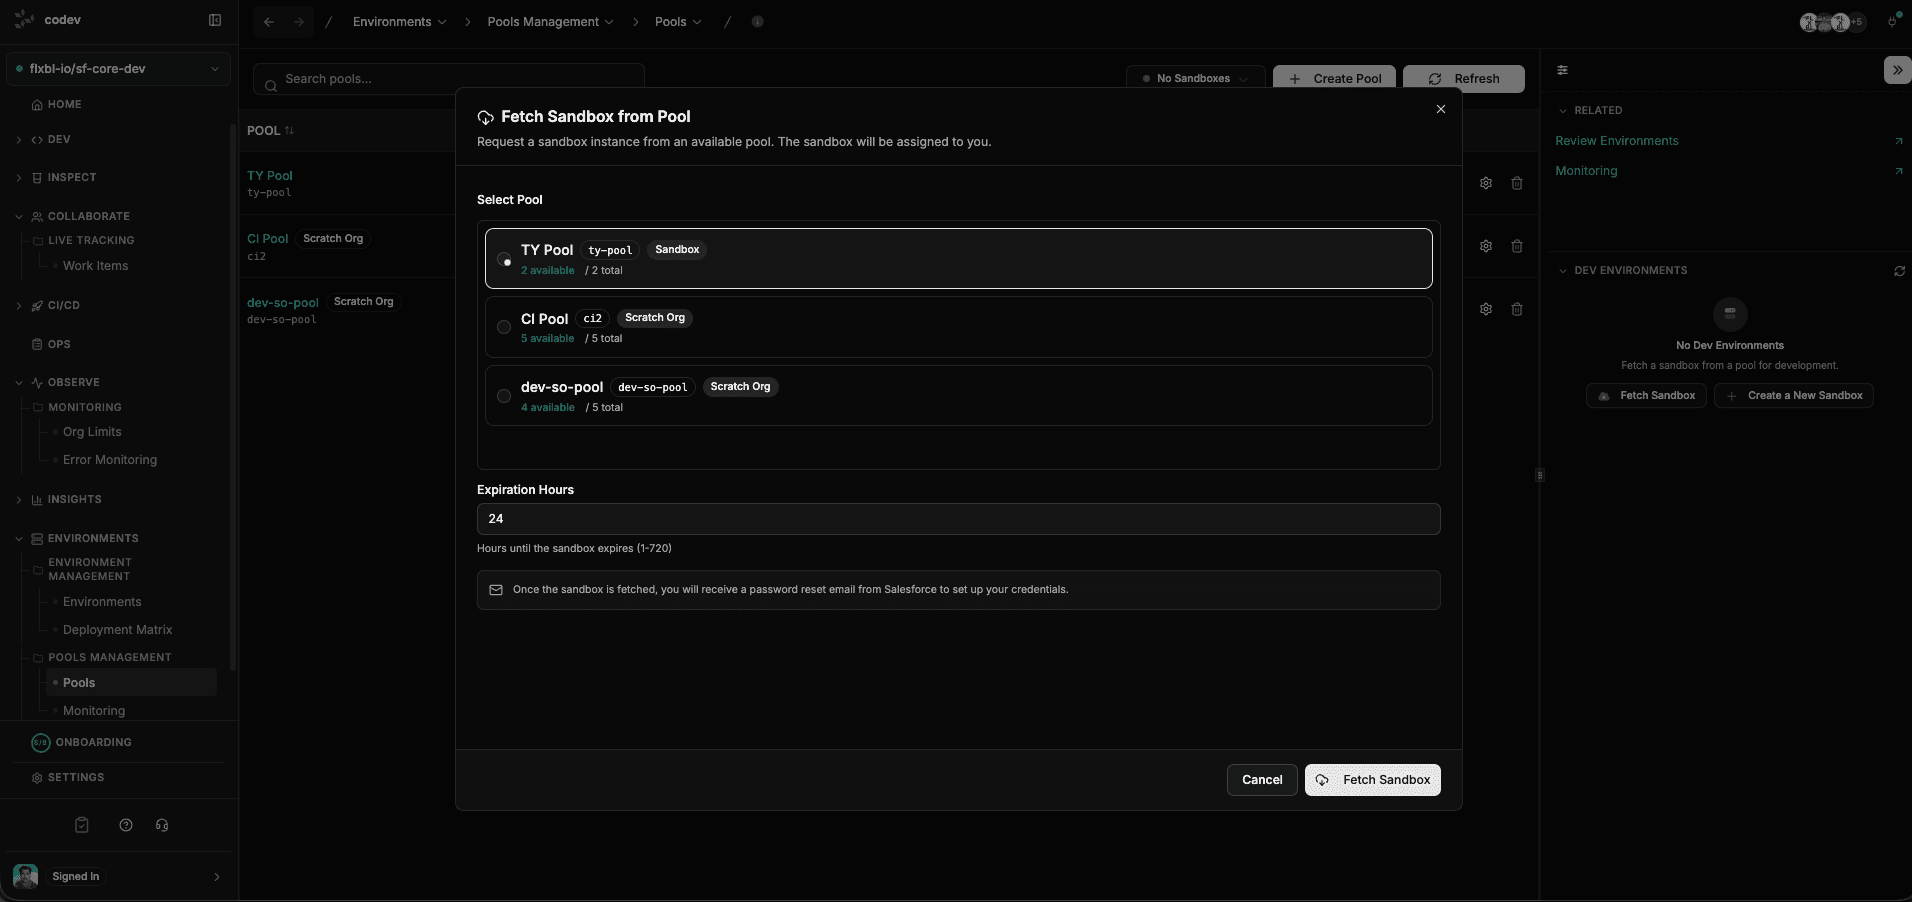
Click Fetch Sandbox from the Pools page or from the DEV ENVIRONMENTS panel on the right. The dialog shows all pools with their current availability — how many environments are ready and the total capacity.
Select a pool and set the Expiration Hours — this is how long the environment will be assigned to you before it expires and returns to the pool. Click Fetch Sandbox to grab it.
Once fetched, you receive a password reset email from Salesforce to set up your credentials. The environment is immediately assigned to you.
You can see all environments assigned to you under Dev > My Orgs > Assigned to Me in the sidebar.
Managing pool instances
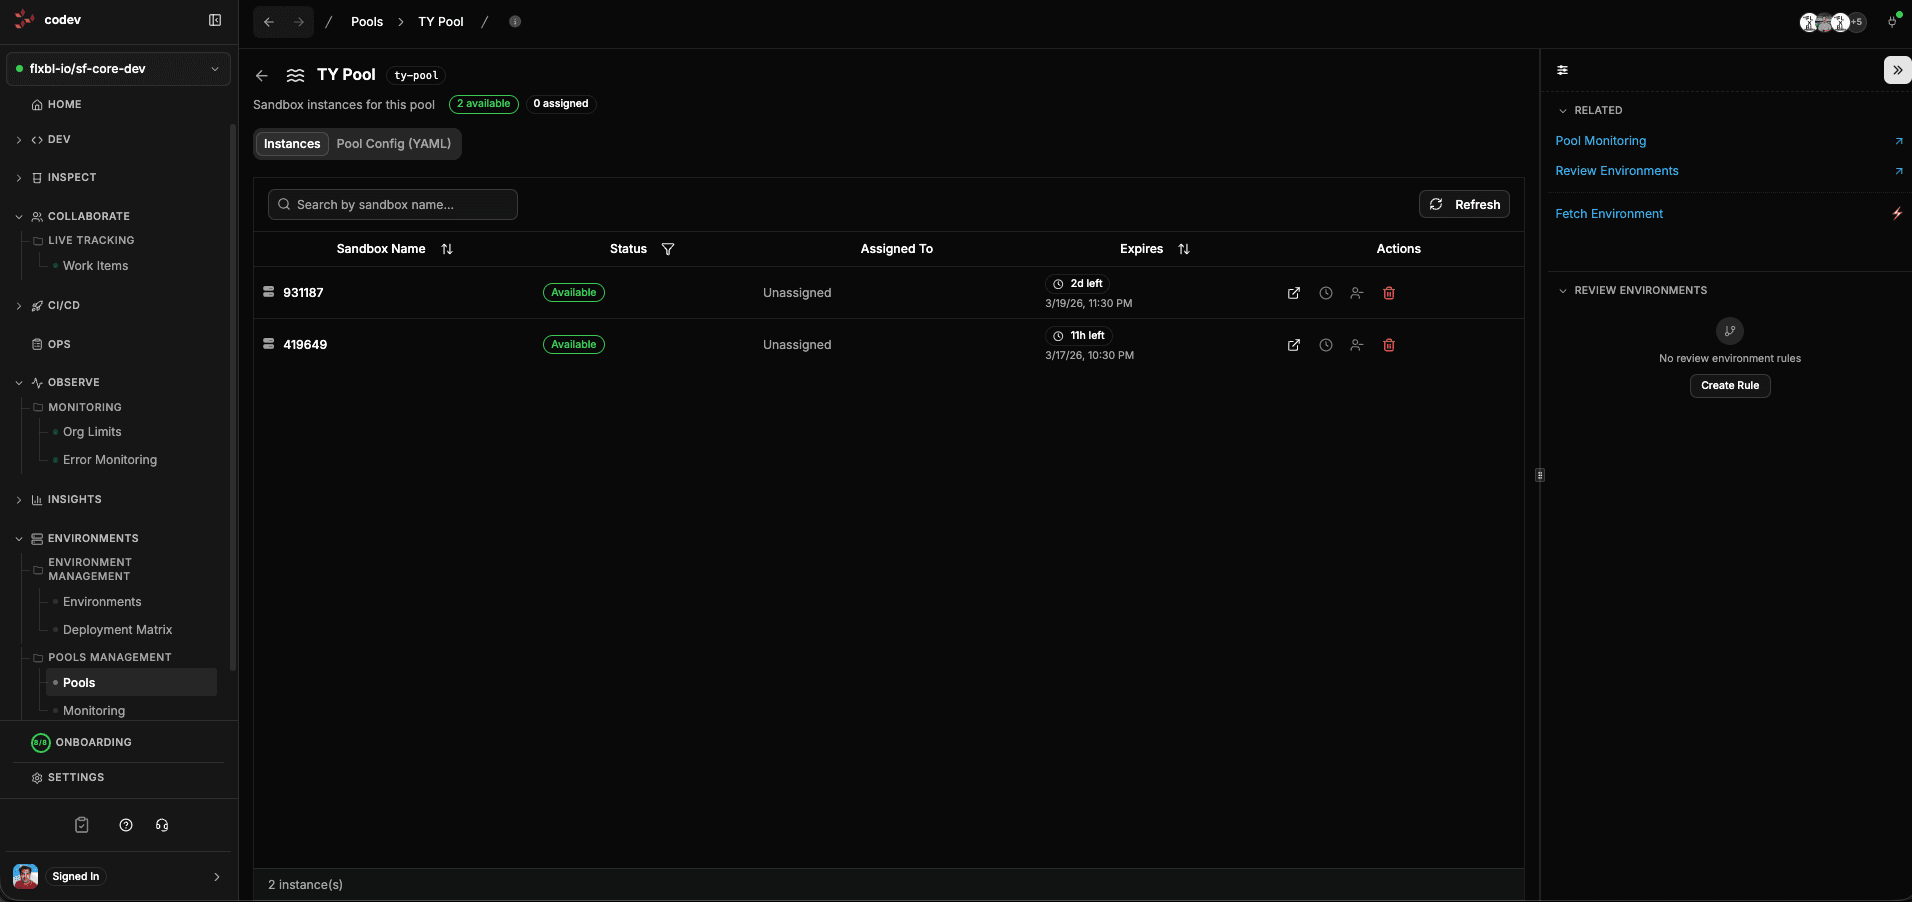
Click any pool name on the Pools page to see all its instances. Each instance shows:
- Its current status — Available, Assigned, Provisioning, or Expired
- Who it is assigned to (if anyone)
- When it expires, with a countdown (e.g., "2d left", "1h left")
- Action buttons to open, extend, or delete it
Switch to the Pool Config (YAML) tab to view or edit the pool's configuration.
Where instances come from
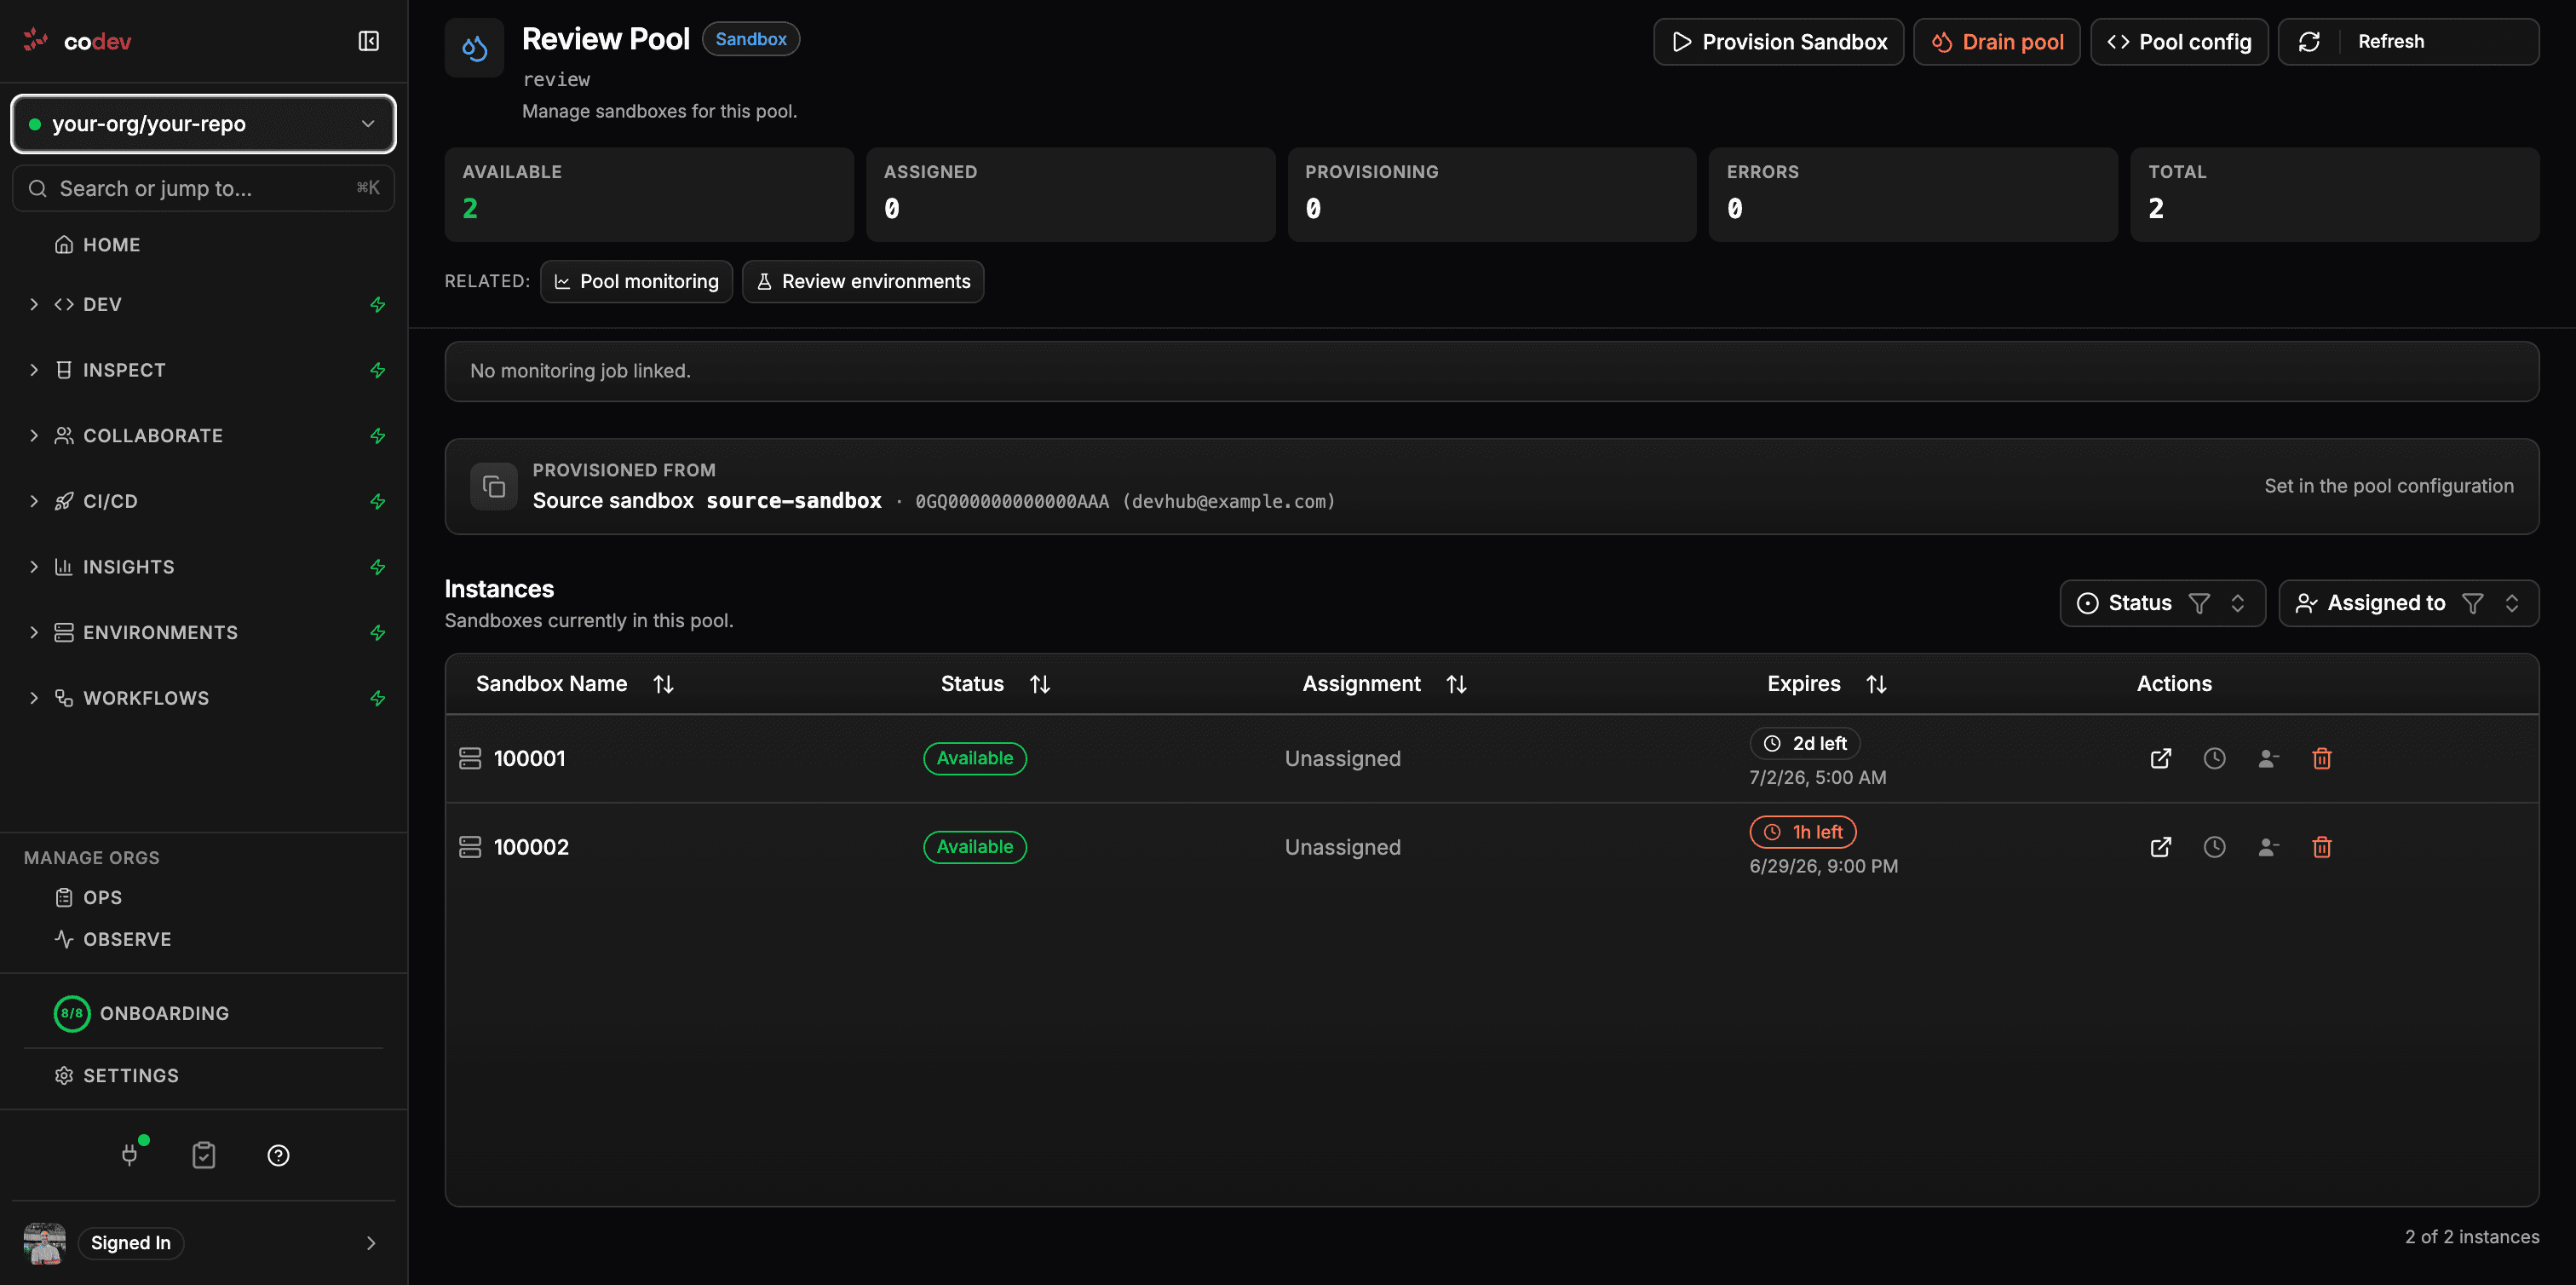
The pool detail page shows a Provisioned from card — the base each instance in the pool is built on. What it shows depends on the pool type:
| Pool type | Provisioned from | Shown as |
|---|---|---|
| Sandbox | A source sandbox it clones | the sandbox name, its SandboxInfo id, and the owning org |
| Sandbox | Production (no source sandbox) | Production and the license type |
| Scratch org | A base snapshot | the snapshot name, its OrgSnapshot id, and the owning org |
| Scratch org | A fresh scratch definition (no snapshot) | Scratch definition and the definition file path |
The base is read-only here — a scratch org's snapshot lives in its scratch definition file in the repository, and a sandbox's source is set in the pool configuration. The Salesforce id is looked up live and shown alongside the name when the base exists; the name is shown on its own when it does not. To change the base, edit the pool's definition (see Creating and configuring pools).
Adding users to an environment
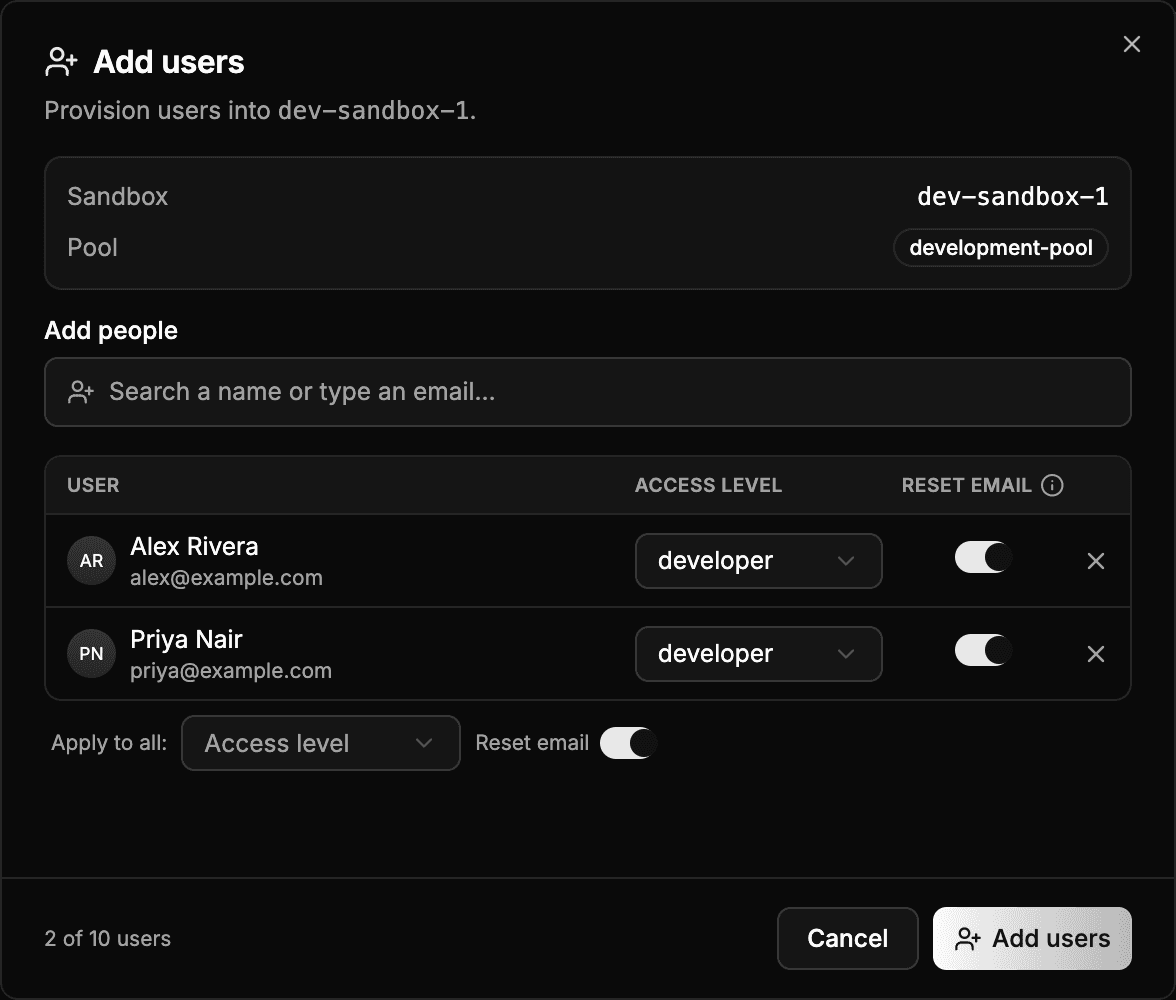
An environment assigned to you starts with your user only. The Add users action on the environment card under Dev > My Orgs > Assigned to Me creates further users in it.
Search for a teammate by name or type an email address. Each row carries its own access level — the profile and permissions the user is created with — and a Reset email toggle that sends the Salesforce password-reset email. Apply to all sets both across every row. A run takes up to ten people.
The access levels come from the project's developer config; with none stored, the dialog blocks submission and links to the page where an owner creates one. Users are created in the org one at a time, so a run can partially succeed — a profile with no license left, for example. codev reports which addresses failed and why, and keeps the users it created.
Extending an environment
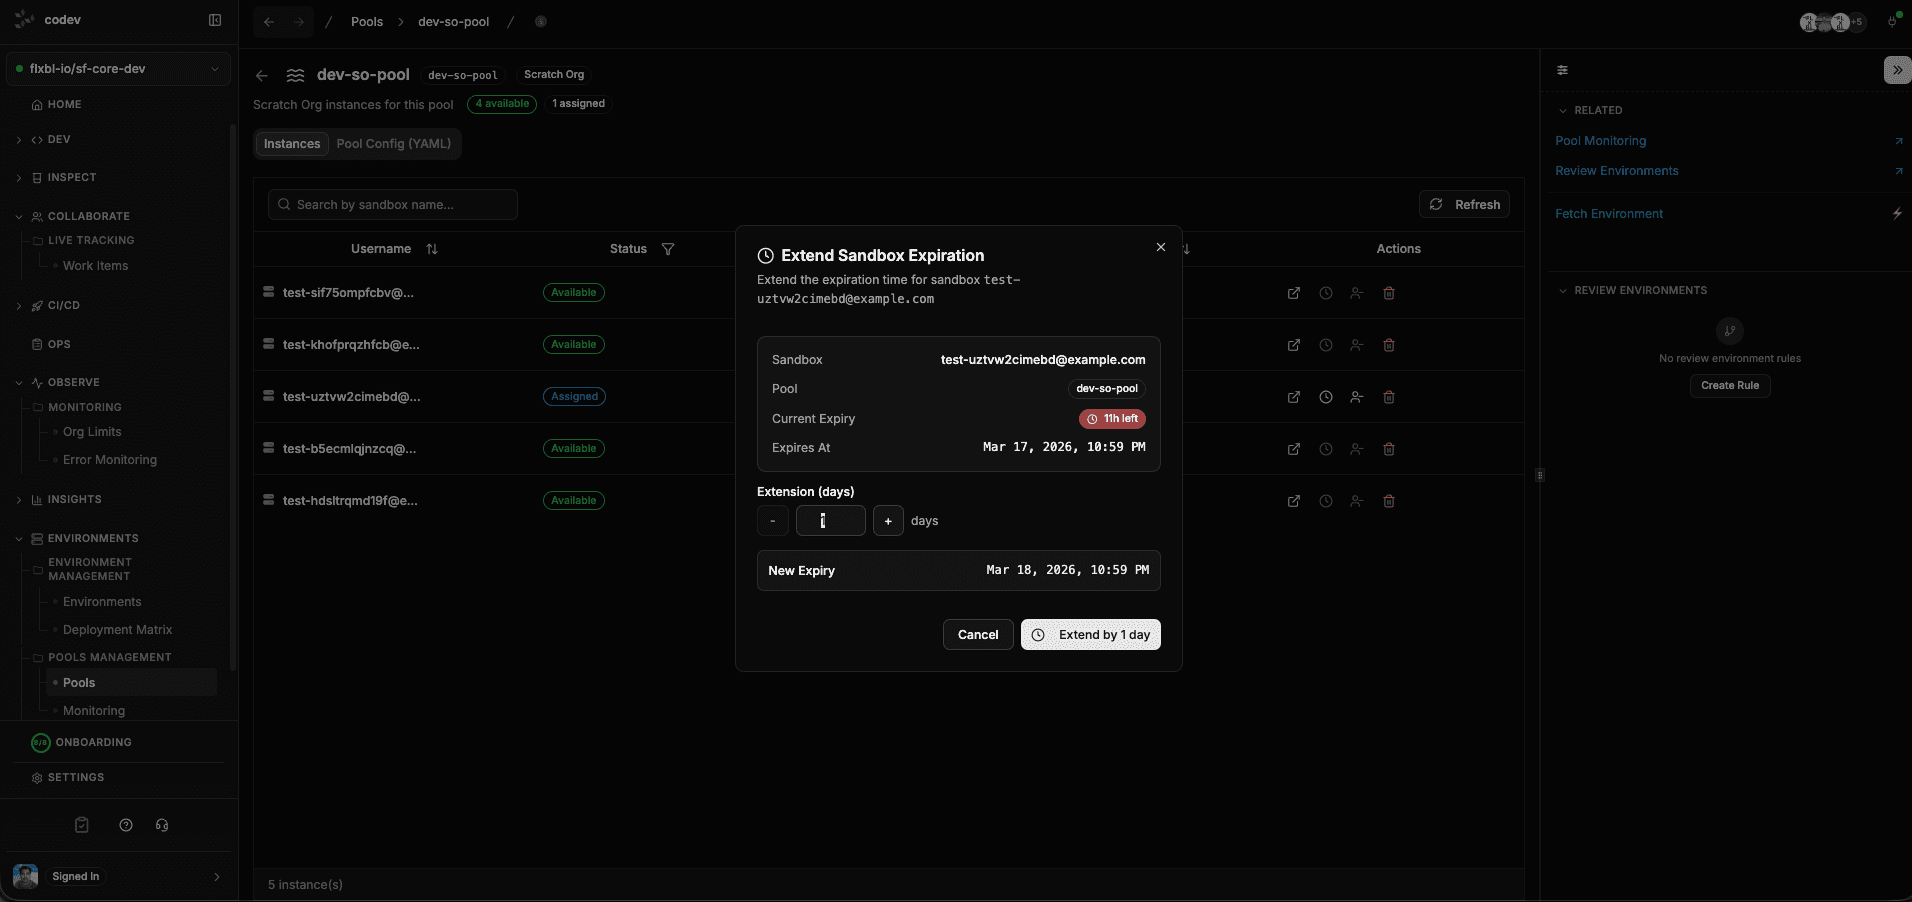
If you need more time with an assigned environment, click the extend action on the instance row. The dialog shows the current expiry date and lets you add days. The new expiry is previewed before you confirm.
This is useful when a feature takes longer than expected or when you need to keep an environment around for a demo or review.
Returning an environment
When your lease expires, the environment is automatically returned to the pool and made available for others. You can also return it early from the pool detail page by unassigning it.
Returned environments may be refreshed, reused, or deleted depending on the pool's expiration strategy.