Builds
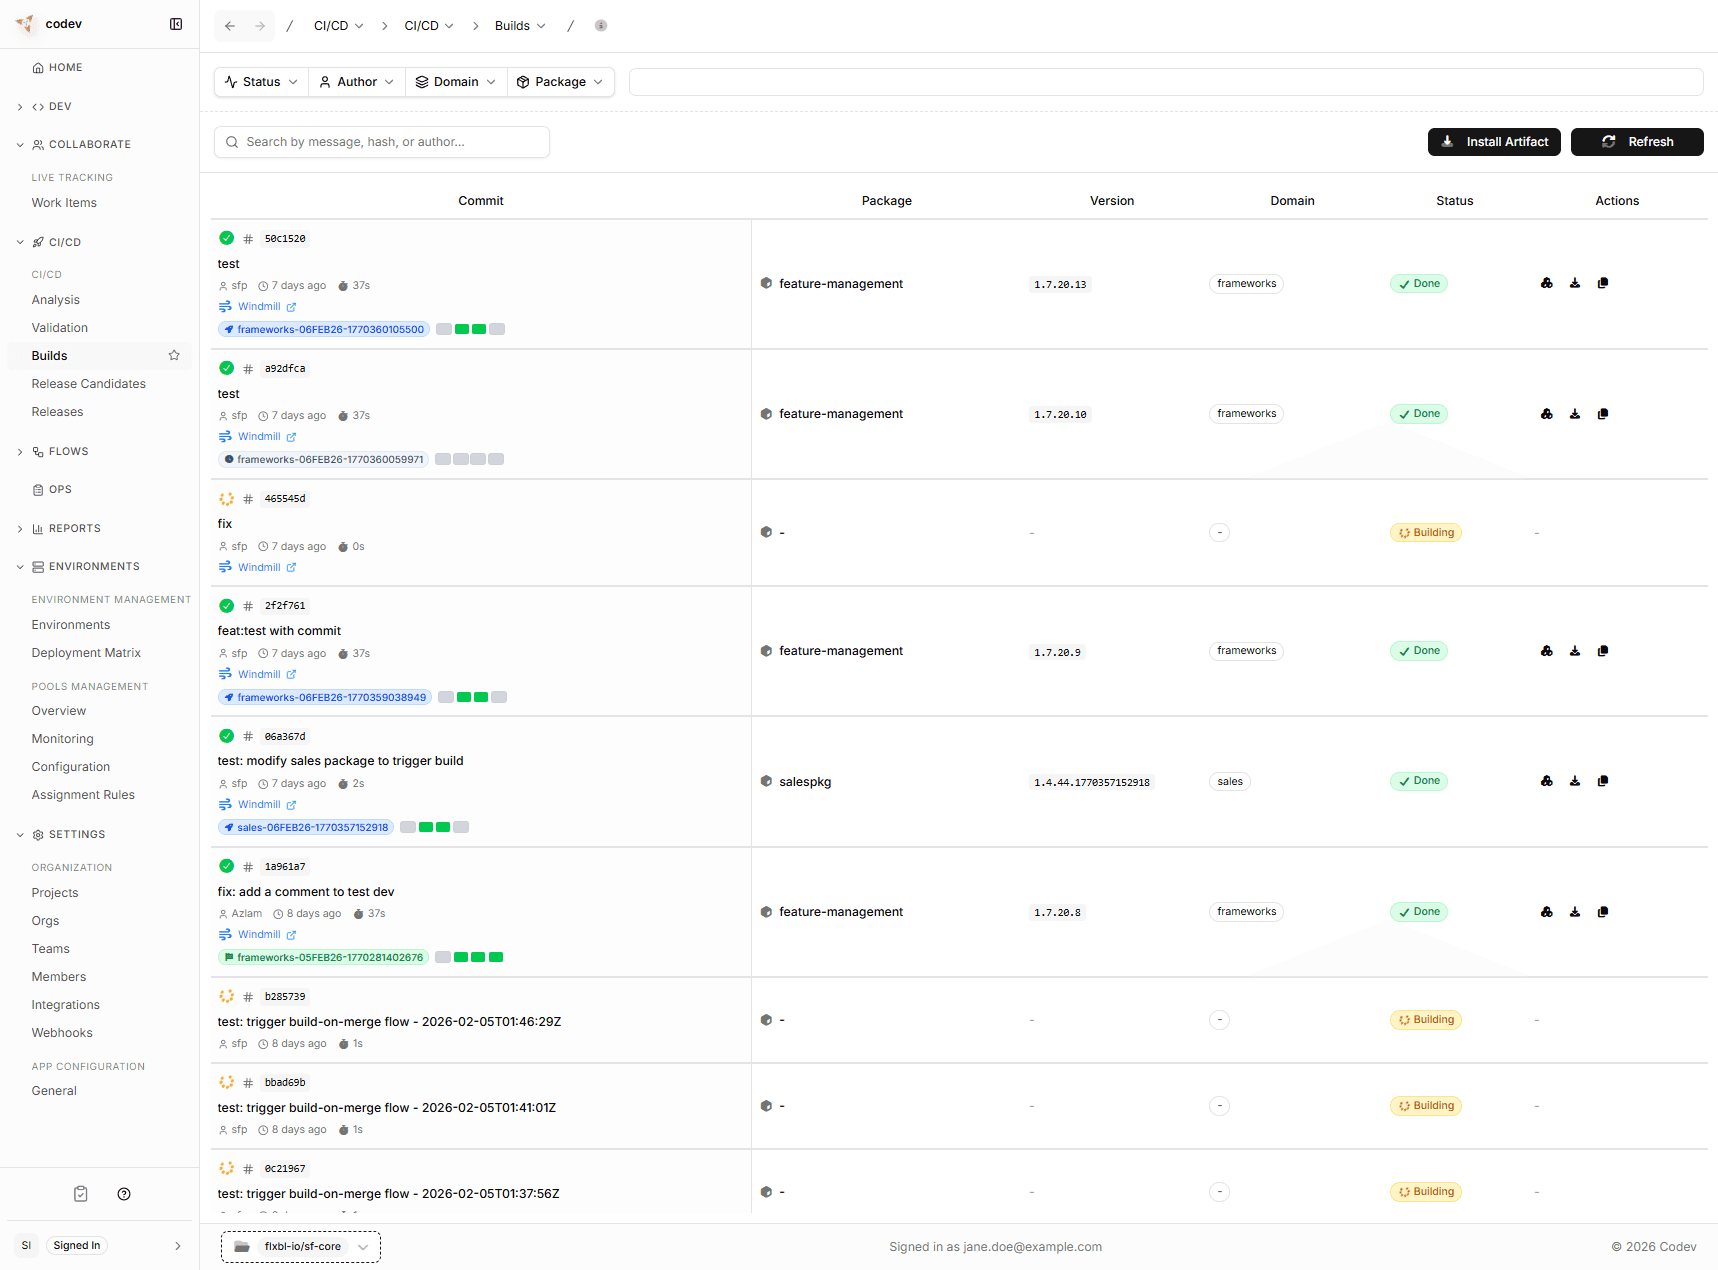
codev comes with a built-in CI/CD system. Once server builds are enabled (see Enabling and disabling — they are off by default), a merge into your repository builds the affected Salesforce packages and prepares them for deployment. No external CI/CD tool or pipeline configuration is needed.
This is the step where your metadata changes are packaged up and made ready to deploy. codev runs it on merge once enabled, and it only builds what actually changed.
What happens when code is merged
- codev detects the merge and figures out which domains were affected by the change. Packages in unaffected domains are skipped entirely.
- Each affected package is built — codev compiles the metadata, runs any configured validations, and produces a versioned artifact. An artifact is a snapshot of your package at that point in time, tagged with a version number.
- A release candidate is created — once all affected packages are built, codev bundles them into a release candidate. This is the thing you will later deploy to your sandboxes or production org. It appears automatically on the Release Candidates page.
Builds within the same repository and branch are queued — if two developers merge back-to-back, the second build waits for the first to finish. This prevents conflicts during artifact publishing.
Running a build manually
Merging is not the only way to start a build. Run build on the Builds page builds a chosen commit on a configured branch, and lets you decide which packages are included.
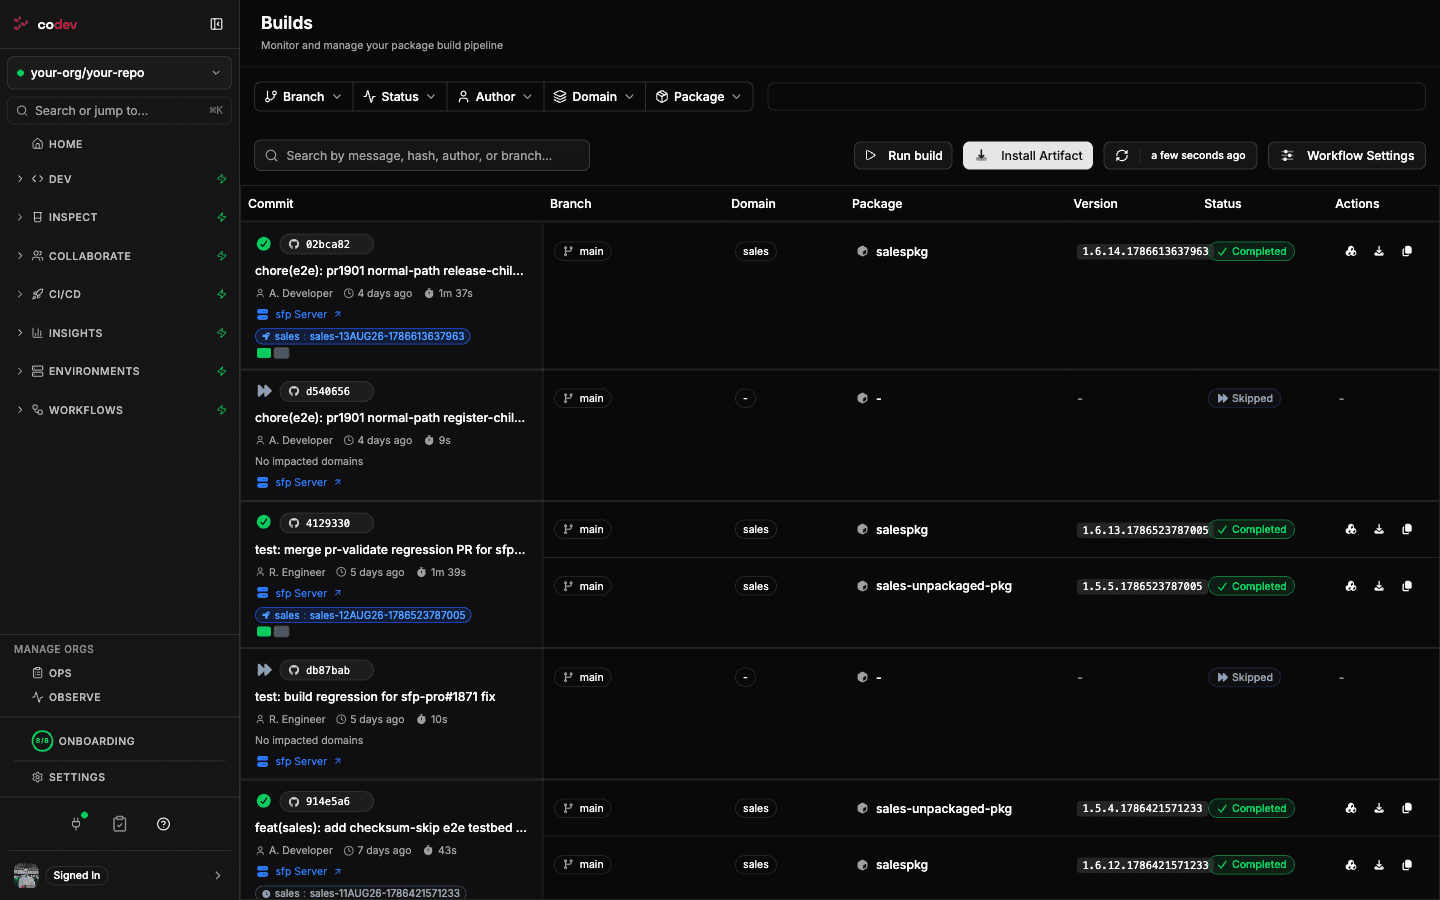
Use it when a merge did not produce the build you needed — a webhook that never arrived while the server was updating, a commit that landed before builds were enabled, or a package you want rebuilt without pushing a new commit.
Choosing the commit and the packages
Pick a Branch, then a Commit from that branch's recent history. codev works out which packages the commit changed and preselects them, marking each one changed.
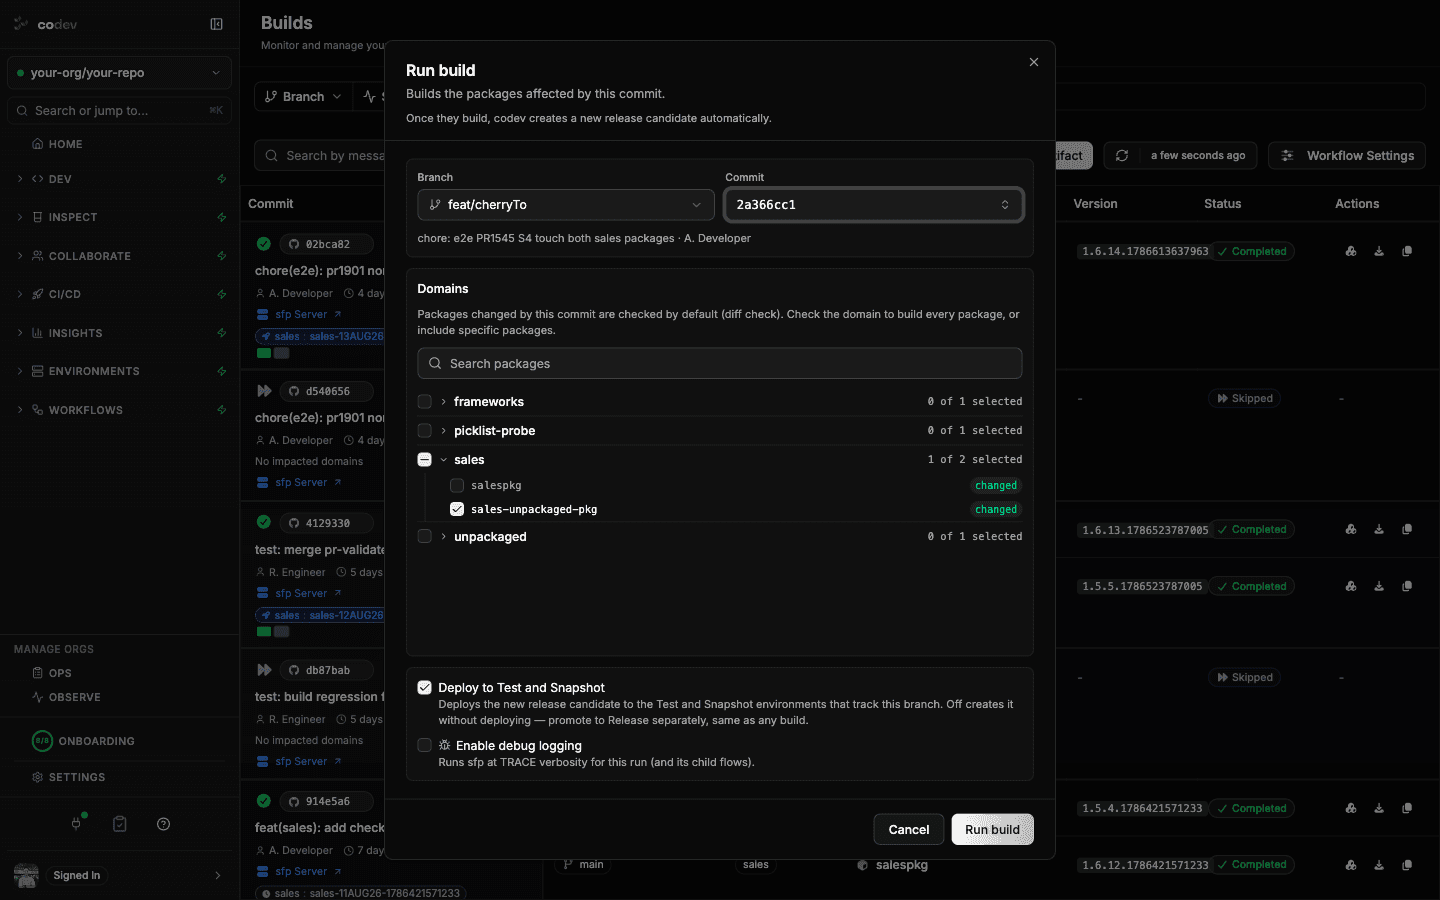
The selection is yours to change:
- Checking a domain builds every package in it, not only the changed ones.
- Checking individual packages adds packages the commit did not change.
- Unchecking a changed package leaves it out. The build and the resulting release candidate then contain only the packages that stayed selected.
With nothing selected, Run build stays disabled — there is nothing to build, and no release candidate is created.
While codev is still working out which packages changed, the domain list and Run build are disabled. If that calculation cannot finish, the dialog reports it and offers Retry.
What the run produces
A manual run goes through the same build as a merge: each selected package is built and published, and the domain's packages are bundled into a release candidate. See Release candidates for what a candidate contains and how it is released.
Two toggles control the run:
- Deploy to Test and Snapshot — on, the new release candidate is deployed to the Test and Snapshot environments that track the branch. Off, the candidate is created without deploying; promote it separately, the same as any build.
- Enable debug logging — runs sfp at TRACE verbosity for this run and the flows it starts. Use it when a build fails and the normal log does not say why.
Running the same commit with the same selection again returns the existing build rather than starting a second one. Changing the selection starts a new build.
Configuring builds
Enabling and disabling
Server-managed builds are off by default. To turn them on, click Workflow Settings on the Builds page and toggle Enable server builds. Until this is on, a merge does not trigger a build and the build is recorded as Skipped.
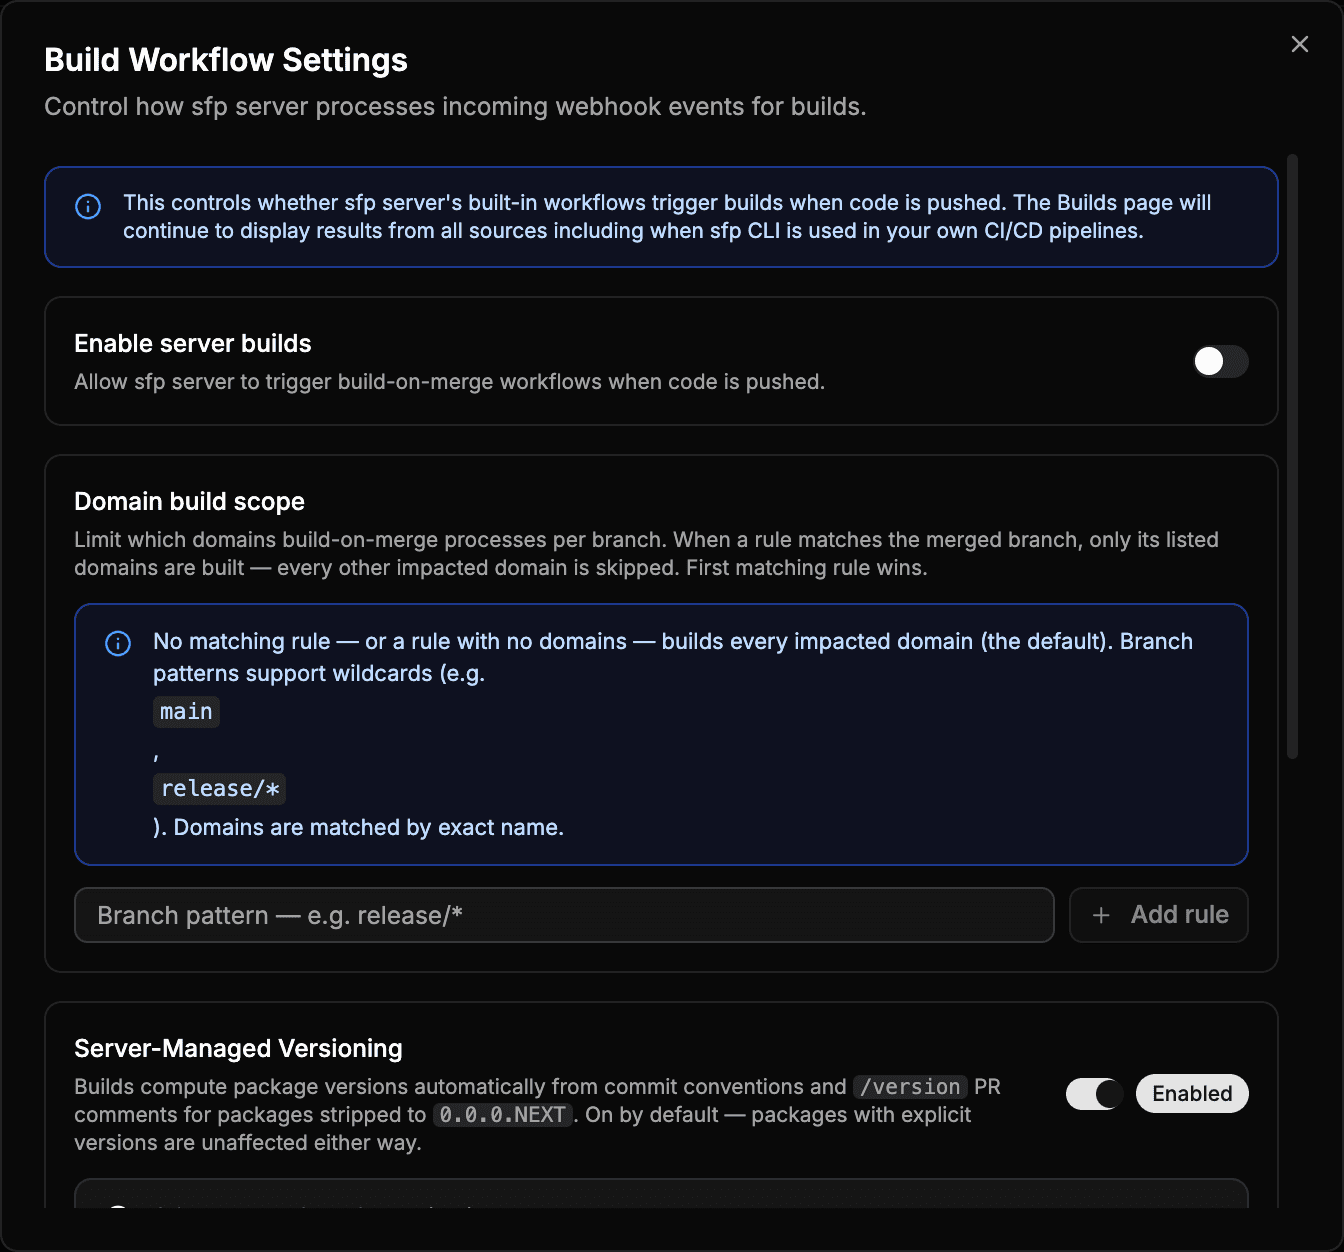
If you also run builds from your own CI/CD pipelines (using sfp build + sfp publish), those builds always appear on this page regardless of the Enable server builds setting. codev's built-in workflow and external pipelines coexist.
Building on other branches
By default, codev only triggers builds for merges to main. To build on additional branches (e.g., develop, release/*), go to Settings > Organization > Projects, click your project, and add the branches to the branches array:
"branches": ["main", "develop"]Excluding specific branches
With server builds enabled but you want to skip certain branches, click Workflow Settings and use Exclude specific branches. This supports wildcard patterns like release/* or hotfix-*.
Deploying to environments by branch
codev selects which environments a build deploys to by their Branch association: each environment tracks a branch, and a build deploys to the environments that track the branch it ran on.
The Branch field accepts an exact name or a glob pattern, so one environment can serve a class of branches without being reconfigured for each new branch:
release/*— every release branchrelease-patch-*— every patch branch cut from a release candidate
An exact name such as develop matches only that branch. Set the field when creating or editing an environment: pick an existing branch from the list, or type a pattern. Production environments are not deployed to on merge — they receive releases through release candidates.
When a deployment fails
Building and deploying are two stages of the same run, and they can end differently. If the packages build but the deployment to an environment fails, the run in Workflows > Runs shows Partial — the build succeeded and produced a release candidate, so the run was not a total failure. The commit check (sfp/Build on Merge) still reports failure.
A Partial build-on-merge run therefore means: the release candidate exists and is deployable, only the automatic deployment leg failed. Open the run, read the failed deployment's log to find the cause (most often a metadata error in the target org), then re-run the deployment from the run — no rebuild is needed. See Run statuses.
Controlling what gets built
codev uses release configs in your repository to determine which packages belong to which domain. Beyond that, you can control the build process through your project's sfdx-project.json:
- Skip a package from builds entirely — add
"ignoreOnStage": ["build"]to the package entry insfdx-project.json. The package will be ignored during all builds. See Ignoring packages from being built. - Build packages together as a group — use the
"buildCollection"attribute to ensure a set of packages always builds together when any one of them changes. See Building a collection of packages together. - Ignore specific metadata components — use per-stage
.forceignorefiles to exclude certain components from the build. See Selective ignoring of components. - Use different scratch org definitions per package — configure
scratchOrgDefFilePathsinsfdx-project.jsonif different packages need different org shapes for validation. See Multiple config files.
All package types are supported: source packages, unlocked packages, org-dependent unlocked packages, data packages, and diff packages. See Package types.
Artifact details
Clicking the artifact action on any build row opens a side panel showing the full picture of what was built — package type, metadata counts, whether Apex was found, test coverage results, and publishing timestamps.
From builds to release candidates
Builds that successfully publish artifacts and generate a release definition produce a release candidate. The RC name appears below the package name in the builds table.
If a build shows Completed but no RC name appears, the release definition generation may have failed. Click the sfp Server link in the build row to inspect the workflow execution logs.