Migrating to codev
How a team already running sfp in their own CI — on GitHub Actions, Buildkite, or any pipeline — moves those workflows onto codev, one capability at a time.
If your team already runs sfp in your own CI, codev runs those same commands. Today your pipeline — GitHub Actions, Buildkite, or another CI system — invokes sfp build, sfp install, sfp release, prepares pools, and leases review environments itself.
From v51, sfp runs against sfp server; it is no longer a standalone CLI, so every sfp workflow needs a server. codev is the platform UI over that server: the sfp CLI runs under the hood, and codev connects to your repository, listens for push and pull-request events, and runs build-on-merge, validation, and pooling for you. The commands don't change; what changes is that you stop wiring them into CI, and the server runs the sfp CLI.
You do not switch everything at once. The move is gradual and side-by-side: hand one capability — or one domain — to the server, watch it, then hand over the next, while the rest of your pipeline keeps running. During the move, builds the server produces and builds your own CI still produces can appear together on the same Builds page — provided your pipeline runs sfp-pro on the same release as the server (see While you still run some builds yourself).
Start from your CI system
The steps below are the same whatever CI you run today. For a walkthrough mapped to a real pipeline — the exact jobs and commands you have now, and what replaces each one — start with the guide for your CI:
How codev replaces your pipeline
In a self-run pipeline, your CI holds the whole flow: a webhook or push trigger starts a job, the job pulls the sfp image, and each sfp command runs on your runner. With codev, that orchestration moves to the server:
- Onboarding registers webhooks on your repository. Instead of your CI reacting to a push, the push notifies codev directly.
- The server runs the workflow. codev detects which domains a change touches, builds only those, and produces a release candidate — on its own image, so there is no sfp image for you to install, pin, or upgrade.
- Your CI keeps whatever you haven't moved. Anything you still run yourself continues exactly as before, and its results still show up in codev.
Step 1 — Connect the repository to sfp server
codev runs on an sfp server instance connected to your source host. Connecting a repository is what creates the webhooks the server listens on.
Set up the source-control integration for your host, then add the project:
- On GitHub, codev is backed by a GitHub App; onboarding installs it on your repositories and registers the webhooks. See GitHub.
- On Azure DevOps, codev authenticates as a service principal and subscribes to your repository's events. See Azure DevOps.
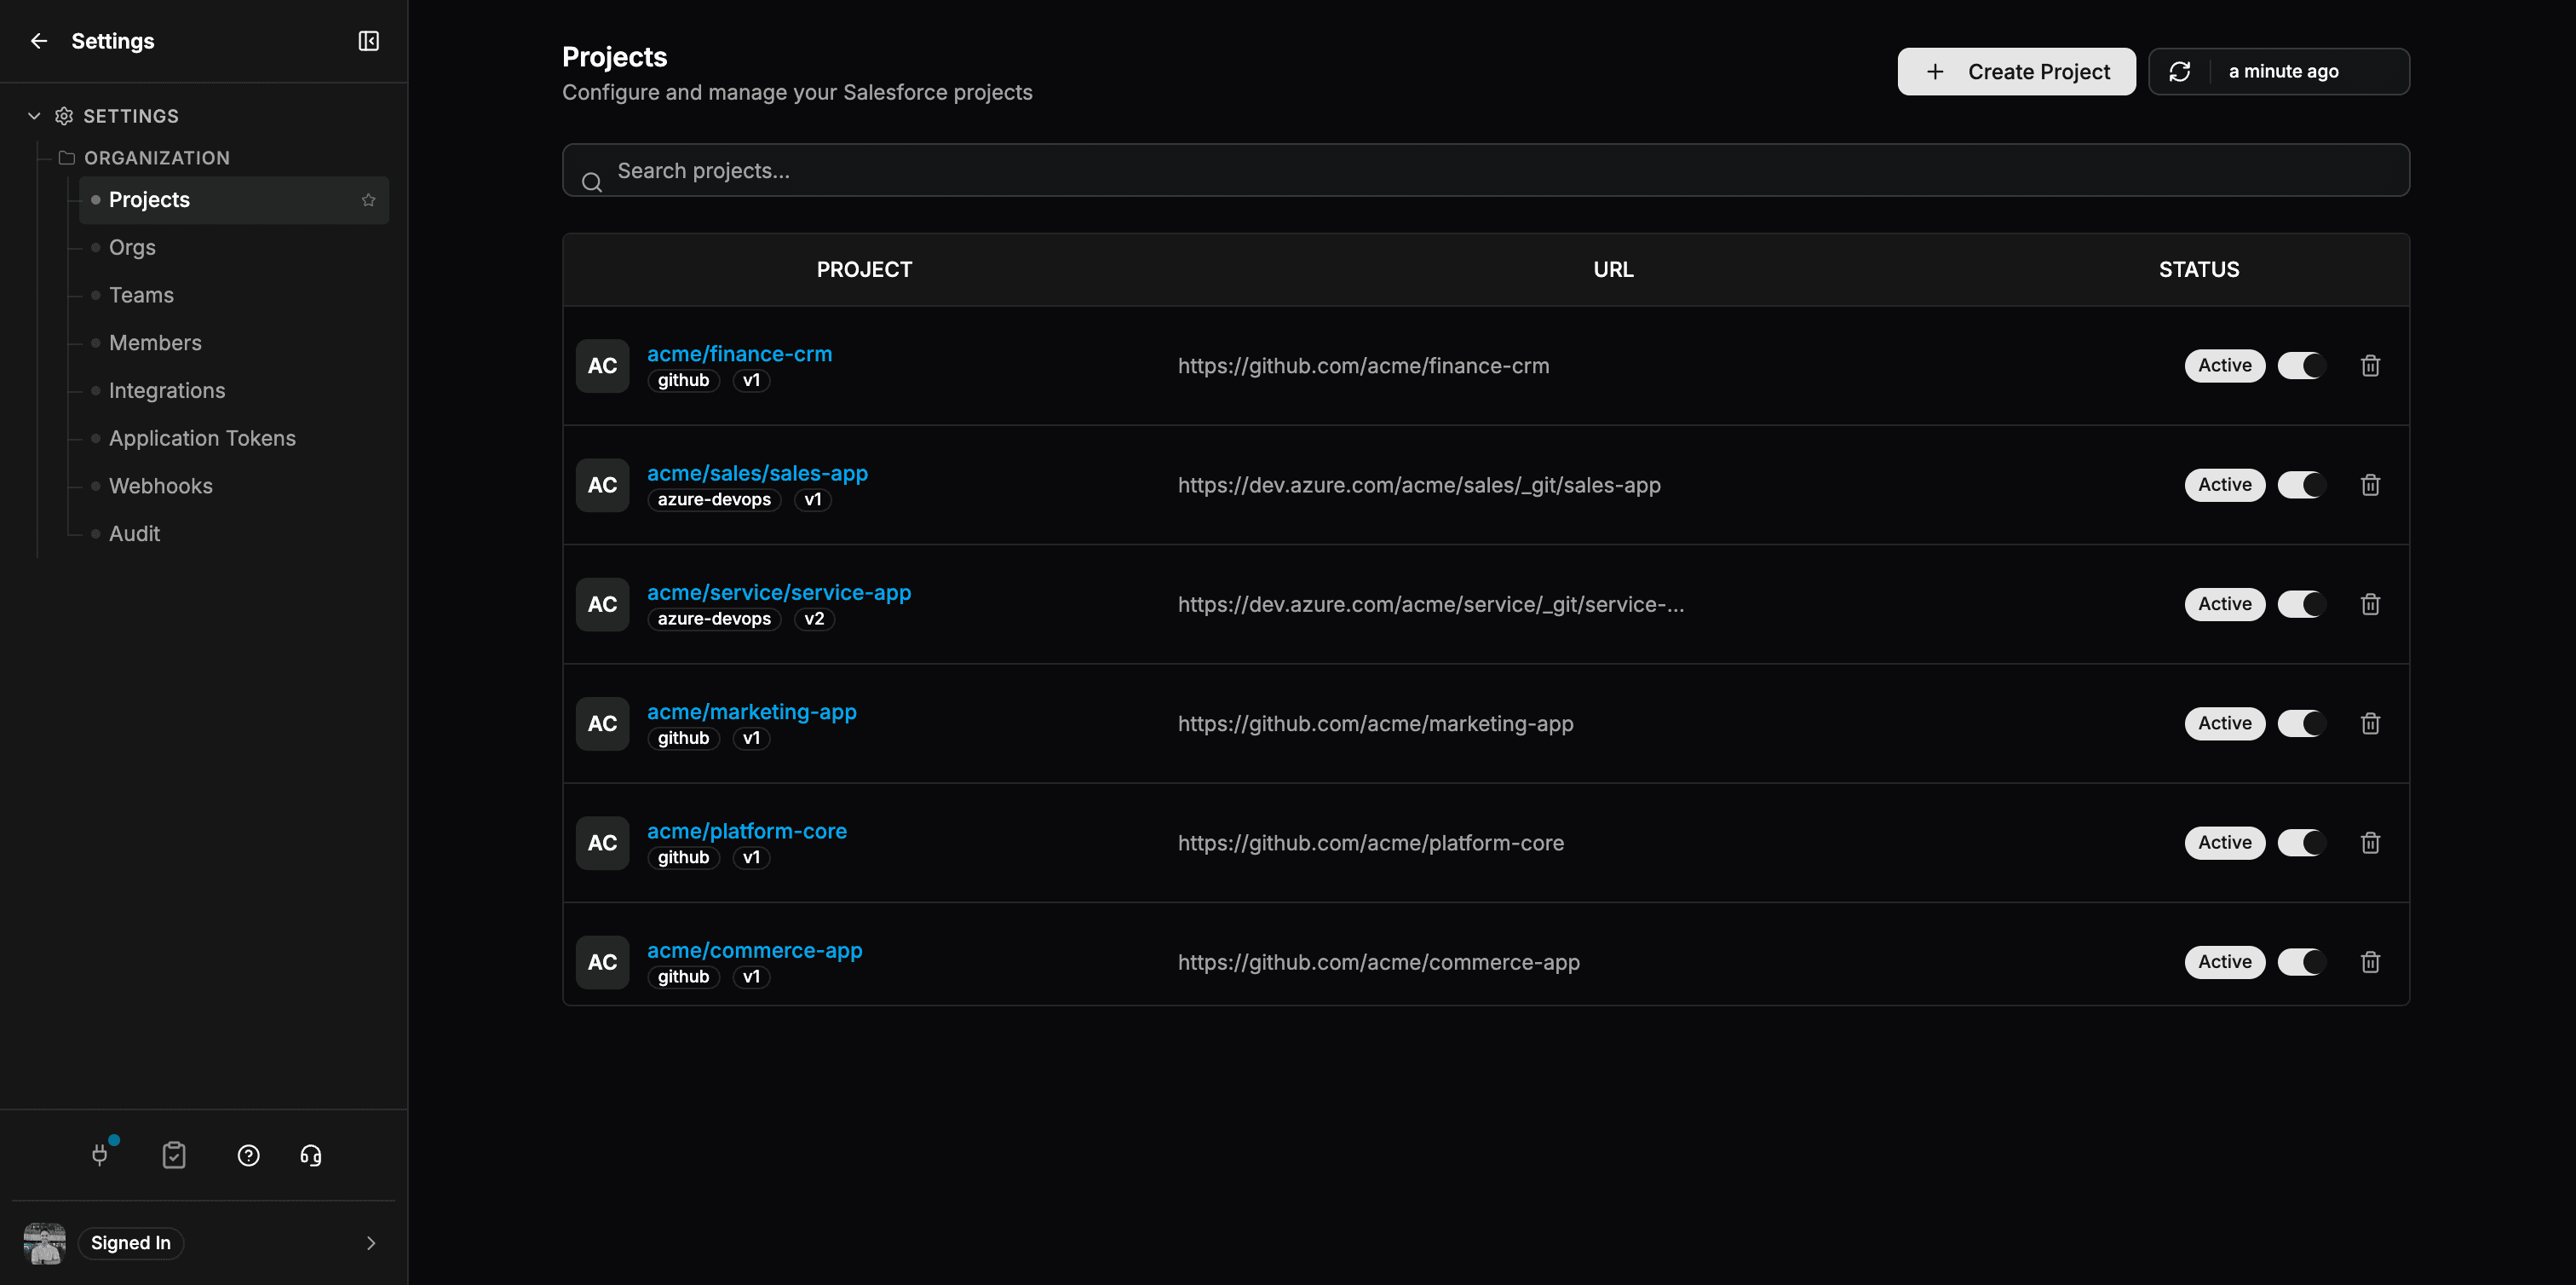
Once the integration is in place, add the repository under Settings > Projects. This is a one-time setup; from here on, the server is notified of pushes and pull requests directly.
Step 2 — Turn on server-managed builds, gradually
With the repository connected, you decide what the server runs. This is controlled per project from the Builds page under Workflow Settings, and it is incremental: nothing you do not switch on changes.
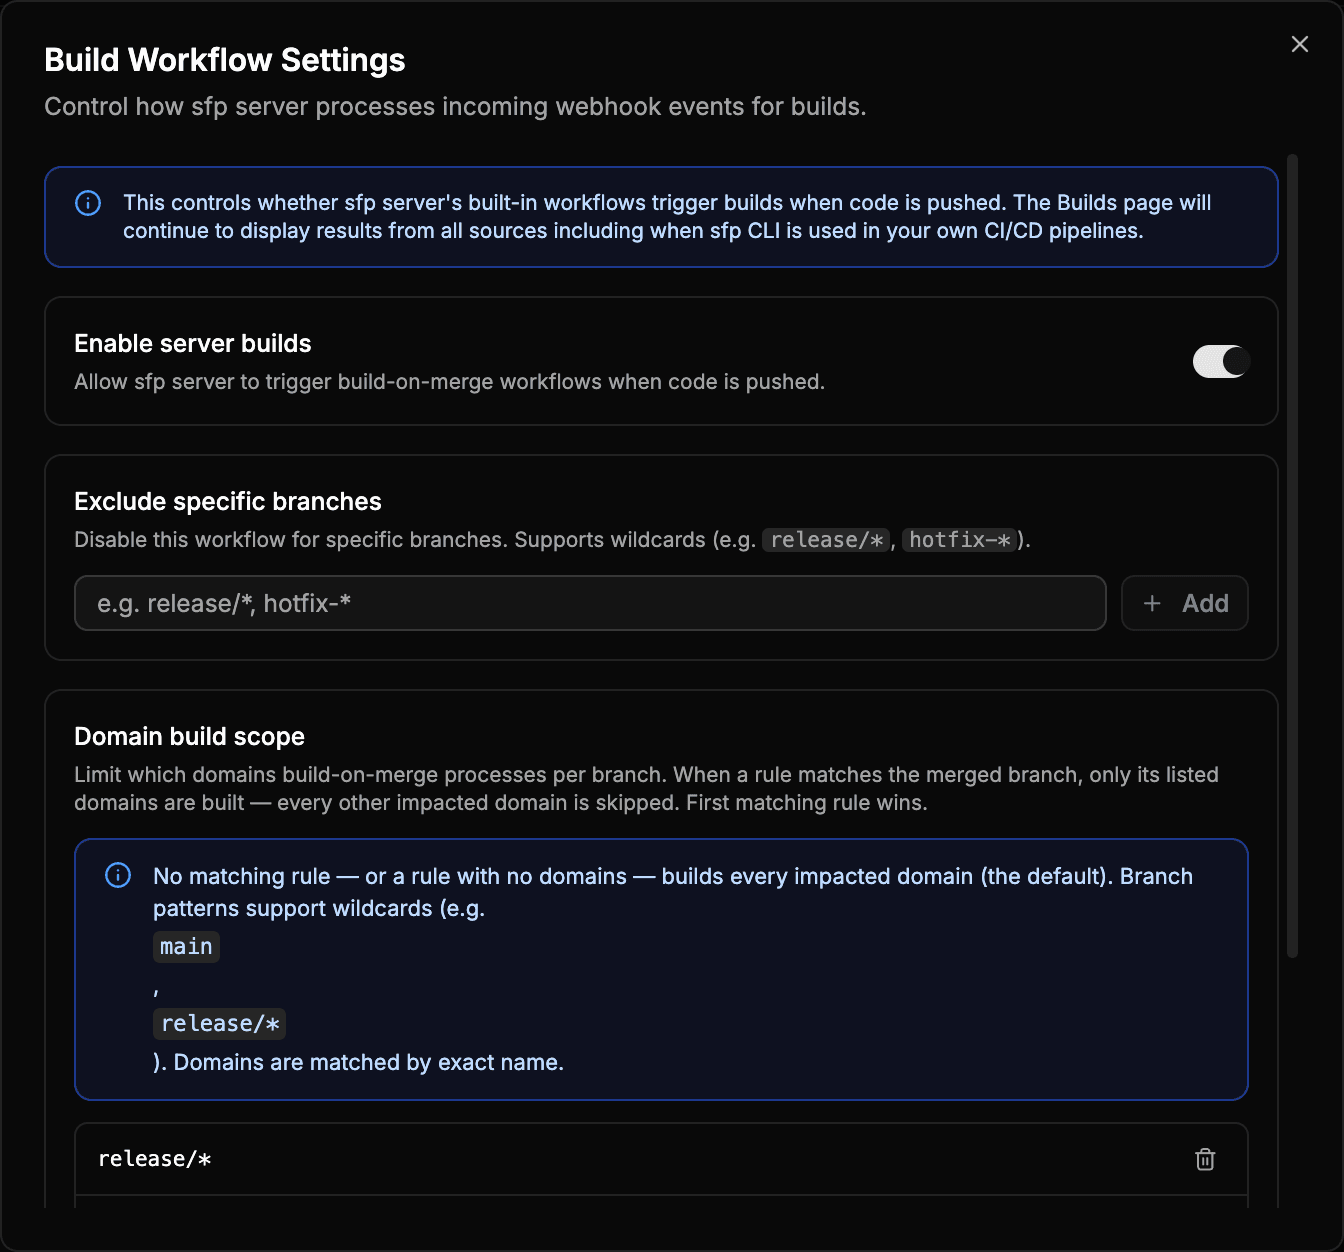
Three independent controls determine what the server runs:
- Enable server builds — the master switch. Off, and the server ignores pushes and your CI stays fully in charge. On, and the server runs build-on-merge.
- Exclude specific branches — keep the server off certain branches (for example
release/*) while it runs on others. Supports wildcards. - Domain build scope — the per-domain control: hand over one domain at a time.
Move one domain at a time
A domain is a group of packages defined by a release config in your repository. Domain build scope lets one team hand a single domain to codev while every other domain in the same repository stays on the existing pipeline.
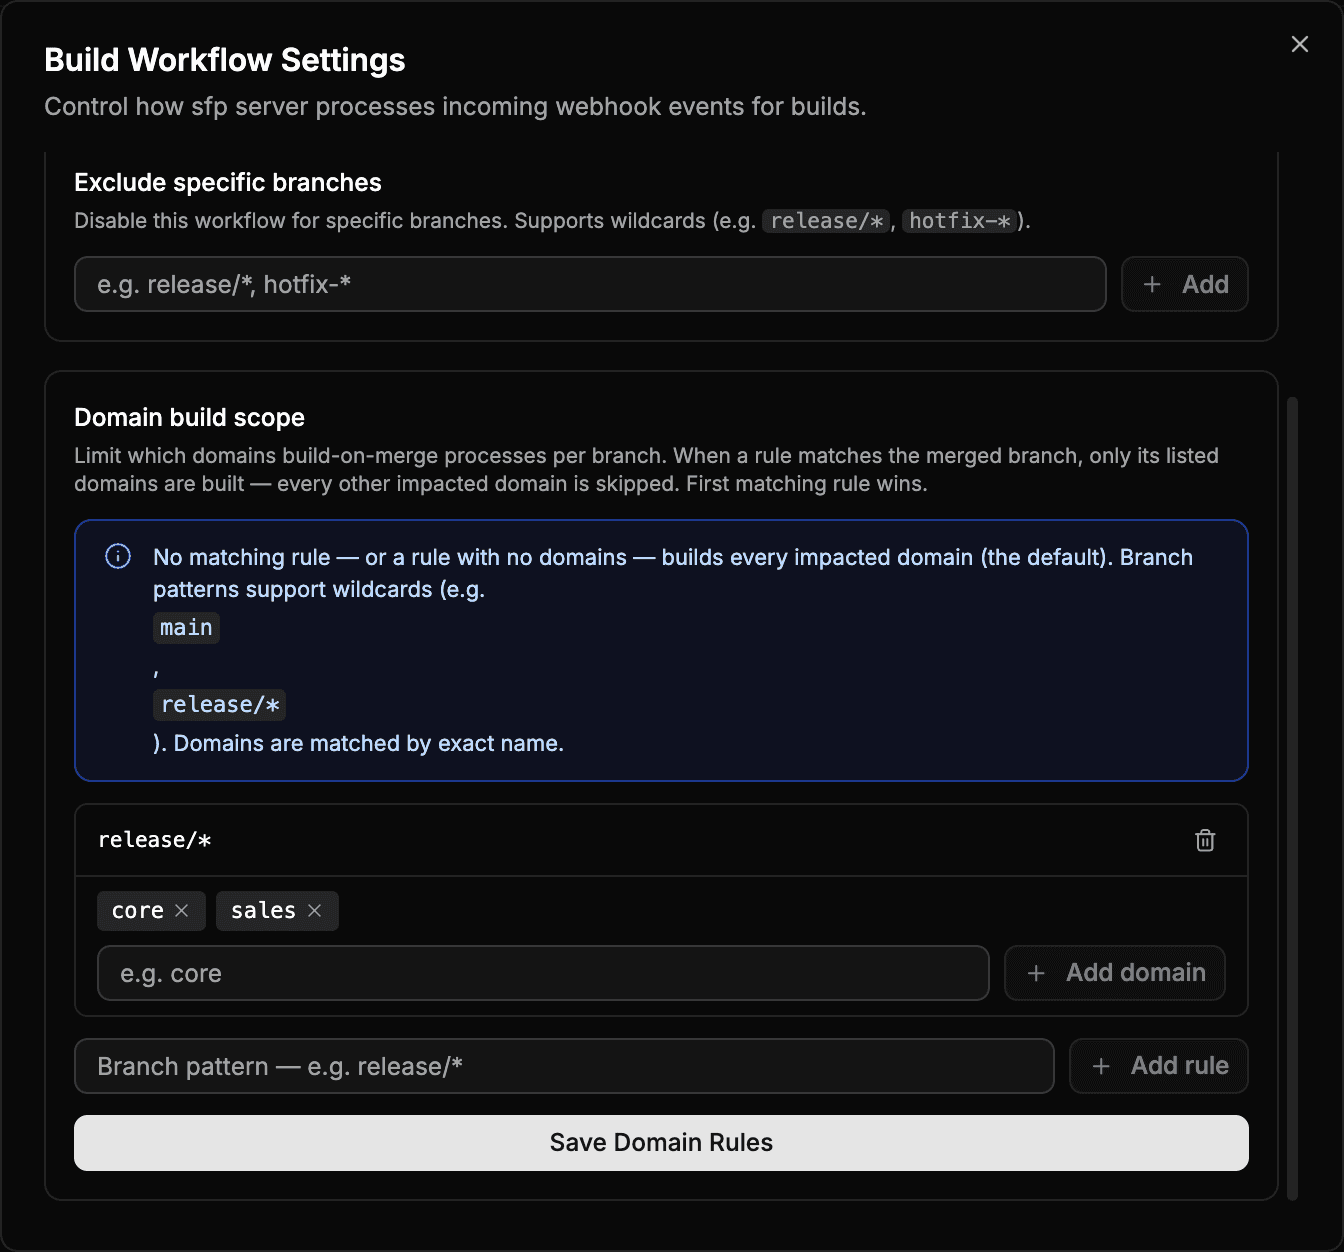
release/*, codev builds only the listed domains and skips the rest. Leave the list empty and every impacted domain builds — the default.Each rule pairs a branch pattern (wildcards allowed, e.g. main, release/*) with an allow-list of domains. When a merge matches a rule, the server builds only those domains; the first matching rule wins. An empty list — or no matching rule — means every impacted domain builds, which is the behaviour before you add any rule. So you can move one domain on one branch, verify it, and grow the list over time without touching the domains your own pipeline still owns.
Step 3 — Let codev run validation and environments
Build-on-merge is usually the first workflow teams move, but the same handover applies to the rest of the pipeline your CI runs today:
- Pull-request validation and review environments. In a self-run pipeline you lease a review org, hold a lock, and return it with explicit CLI calls. codev manages the lease and the exclusive access for you.
- Sandbox and scratch-org pools. Pool preparation and assignment move from scheduled CI jobs to the server.
Move these when you are ready; each is independent, and each one you hand over removes a step from your own pipeline.
While you still run some builds yourself
During the move you will usually keep some builds in your own pipeline. Running the sfp CLI in your pipeline against sfp server — so its builds report to the server and appear on the Builds page alongside codev's — requires sfp-pro, the premium addon for Build Your Own workflows.
With sfp-pro, coexistence holds as long as the sfp CLI in your pipeline is on the same release as the server. The CLI reports build and package metadata through a contract that moves with the server, so a current CLI and the server understand each other and their builds show up side by side. Running an outdated CLI against a current server is not supported.
Coexistence lasts for the duration of the migration. Before you connect a repository, bring your pipeline's sfp-pro CLI up to the server's release; from there, hand each capability over and retire the corresponding CLI step. Confirm the CLI version against the current command reference:
- Upgrading the CLI from v50 to v51 — the image bump and the handful of moved commands, if your pipeline is still on v50
- sfp CLI reference
Work through it in that order: bring the CLI current, connect the repository, hand over build-on-merge, then validation and pools. Each self-run step is retired as the server takes it over.